Display actions next to an item list
Overview
I often have an item list, and the users want to do something with it. For example, it’s used to plan tasks and for some of those subworkflows should be spawned. This typically requires either a Menu button or a path. Since neither one is located near the item list, the user needs to be aware of it. Wouldn’t it be better to display those next to the item list?
Info: If you are confused by the strange button labels, I had to make sure that these characters don’t break anything. :)
Remark: This won’t work in the multi-tenant SaaS environment due to the limited database access.
Implementation
General
This time there’s a slight deviation from the general approach.
We need:
- A global business rule.
- A global form rule.
- A HTML field for the configuration
- A HTML field for the button generation
Yes, we will need 1+x HTML fields, where x is the number of item lists for which buttons should be generated.
Global business rule
You can download the business rule from the repository. When you are creating the business rule you need to use another data source with higher privileges than the <Current BPS database>. We need to read a table to which the bps_user doesn’t have access.
Rule name: ActionButtonData
Description:
Will return the action (menu) button data of the current workflow instance. It's limited to the information which is needed for generating the HTML buttons.
This needs to be executed with higher privileges than the `<Current BPS database>`
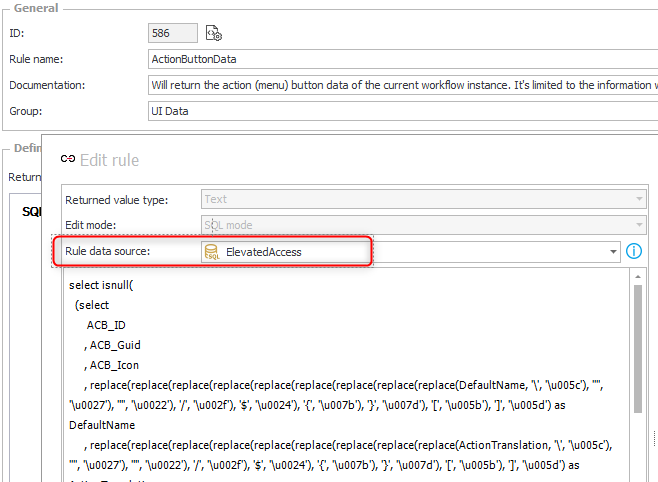
Rule data source in the business rule.
Global form rule
You can download the JS for this form rule from the repository and paste it to the new form rule. Don’t forget to switch the type to JavaScript mode.
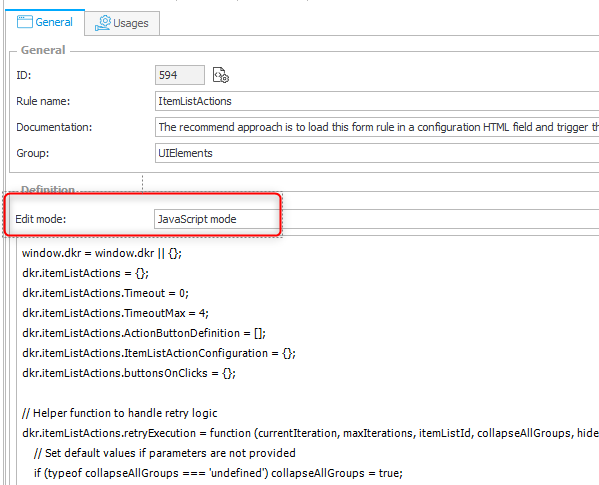
Rule name: ItemListActions
Edit mode: JavaScript mode
Description:
The recommended approach is to load this form rule in a configuration HTML field and trigger the button generation in another field
Configuration field example:
<style id="dkrItemListActionCSSContainer"></style>

<script>
InvokeRule(ThisFormRule_594});
    dkr.itemListActions.ActionButtonDefinitionString = 'ActionButtonDataBusinessRule';
    dkr.itemListActions.ItemListActionConfiguration = {
        "ItemListId": [
            {
                "menuActionId": ActionButtonVariable,
                "isVisible": true,
                "hideMenuAction": true
            }]}
        dkr.itemListActions.init();
</script>

Button generation field:
<script>
dkr.itemListActions.execute(0,4,ItemListId);
</script>
HTML fields
Why are there multiple fields?
Before I explain the implementation let me explain why we at least two fields. I started working with a single field which is placed below the item list. This will ensure that there’s minimal impact when the logic for creating the buttons is executed. In my test scenario, I have tabs with item lists, and I added one field for each item list below it.
This was working fine, but hiding the menu buttons in the toolbar caused flickering. I prevented this by adding another HTML field which is displayed in the top panel.
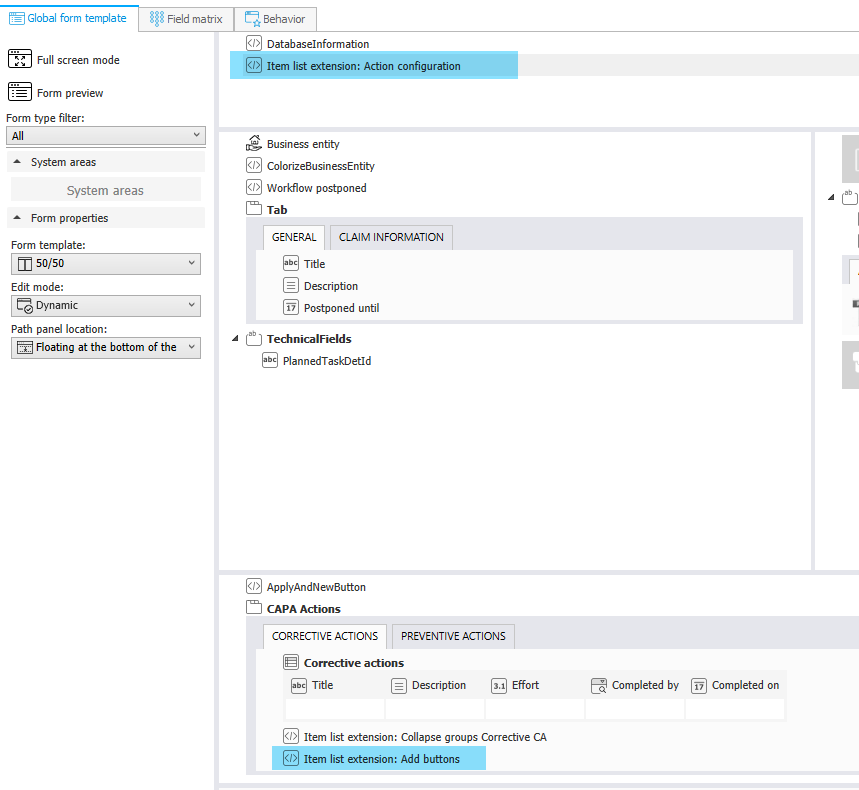
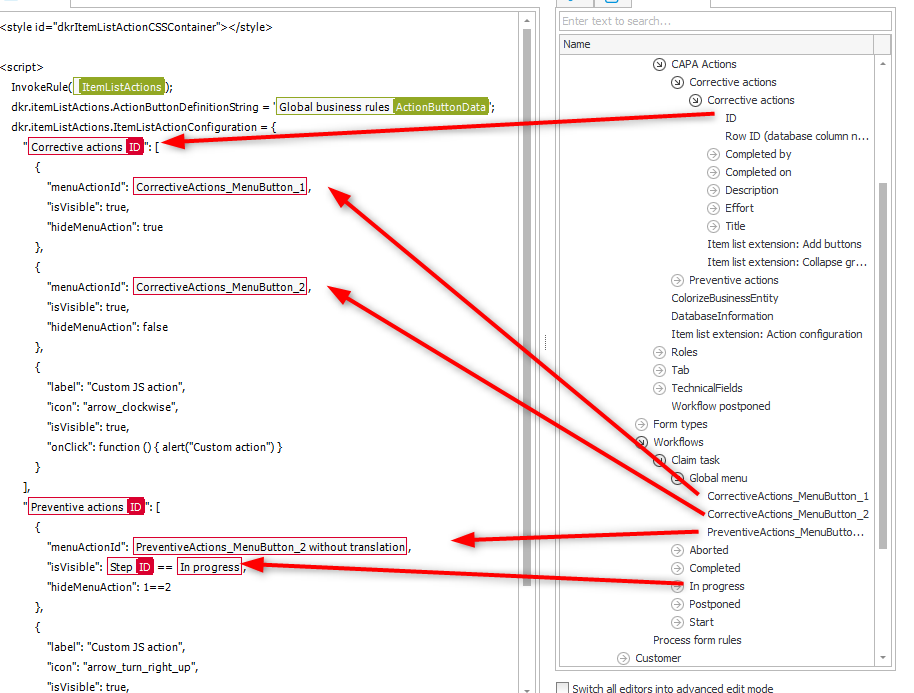
Configuration field
As mentioned, this HTML field should be placed in the top panel. This is the minimal content:
<style id="dkrItemListActionCSSContainer"></style>

<script>
    InvokeRule(#{BRUX:594:ID}#);
    dkr.itemListActions.ActionButtonDefinitionString = '#{BRD:586}#';
    dkr.itemListActions.ItemListActionConfiguration = {
        "#{WFCON:812}#": [
            {
                "menuActionId": #{ACB:23}#,
                "isVisible": true,
                "hideMenuAction": true
            }
        ]
    }
    dkr.itemListActions.init();
</script>
Here’s a short explanation of the content:
- The
styleelement will be used to hide the configured menu buttons. - After invoking the global form rule, the relevant menu buttons are configured
- The initialization will hide the menu buttons and prepare the button generation.
Don’t forget to mark the HTML field as visible in the field matrix.
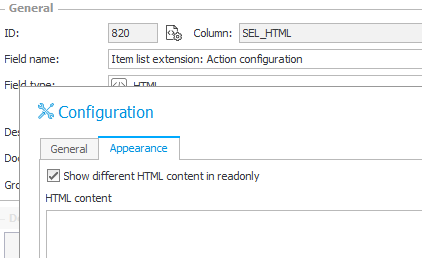
Remark: If your actions are only working in edit mode, you should activate a different HTML content in readonly mode. You could also define other actions for view mode.
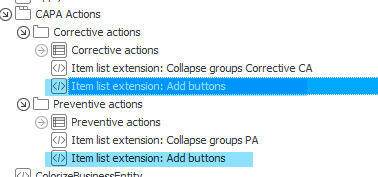
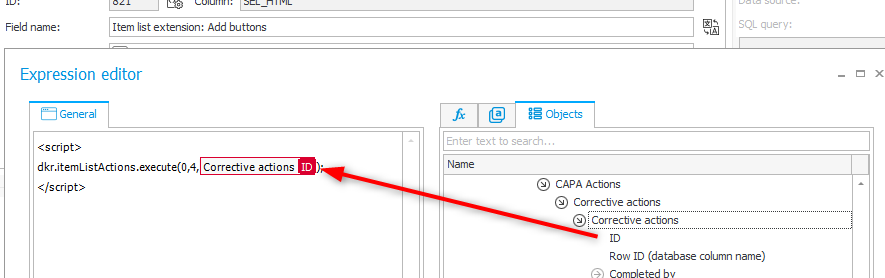
Button generation field
This one is really simple, but it should be added below each item list. If you have multiple item list on one tab, you place one below the last item list, but this may cause flickering, when the buttons are added to the first item list. Creating multiple fields will ensure that they are generated after the item list is prepared. In case of tabs, the HTML field will ensure that the buttons are recreated when the user switches back to the item list. The only difference of the HTML content will be the passed item list id.
<script>
dkr.itemListActions.execute(0,4,#{WFCON:812}#);
</script>
Remark: If your actions are only working in edit mode, you should activate a different HTML content in readonly mode. You could also define other actions for the view mode.
Usage
Make sure that you don’t define a Availability restriction for a menu button.
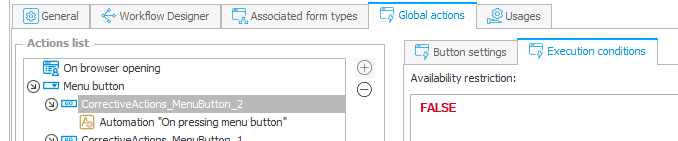
Availability restrictions.
Otherwise, the generated button can’t execute it and will generate a silent error:
installHook.js:1 [WARN] No action button with ID: 24 {message: 'Warning while executing rule: InvokeMenuAction'}
Besides this, there’s nothing to add. The user can simply click on the buttons. :)
Explanations
Using menu buttons
This is the easiest way.
- Configure the menu buttons as you are used to in the Designer Studio
- Automation
- Icon
- Configure the object in the configuration field
{
    "menuActionId": #{ACB:23}#,
    "isVisible": true,
    "hideMenuAction": true
}
Custom buttons
This was actually an unintended feature when I was working on minimizing the necessary configuration data for menu buttons. These are the properties you need to define:
- label
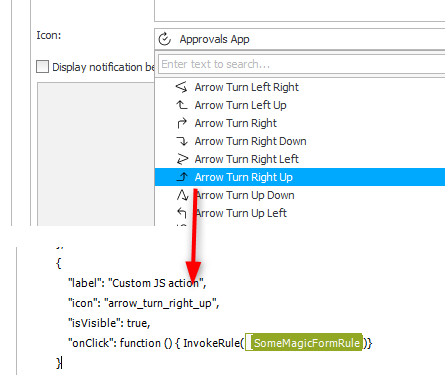
If you need a multilingual label, you can use a business rule. - icon
You can use theIconsetting to search for an appropriate one. If you replace the spaces with underscores and use lower case, you have the icon name. - isVisible
- onClick
This needs to be a function and will be executed when the button is clicked. You could also execute a form rule.
Example:
{
    "label": "Custom JS action",
    "icon": "arrow_turn_right_up",
    "isVisible": true,
    "onClick": function () { alert("Custom action") }
}
Nested replace functions in the business rule
I had to make sure that the data can successfully be transferred to the client and that JavaScript can process it. This required encoding special characters with their Unicode representation for the labels. I had my fair share of issues with these characters in labels when working in multilingual environments.
, replace(replace(replace(replace(replace(replace(replace(replace(replace(DefaultName, '\', '\u005c'), '''', '\u0027'), '"', '\u0022'), '/', '\u002f'), '$', '\u0024'), '{', '\u007b'), '}', '\u007d'), '[', '\u005b'), ']', '\u005d') as DefaultName
Style element in configuration field
This will be used to add the CSS for hiding the menu buttons. When the user leaves form, the element will be destroyed. This will ensure that it does only affect the current workflow instance.
Downgrading for 2025
If you are interested in this for version lower than 2026 R1, you will need to change the generated button html. At least the icon classes have changed in 2026 R1.
In addition, you need to ensure that the icon option is used. The predefined setting has been removed in 2026 R1.
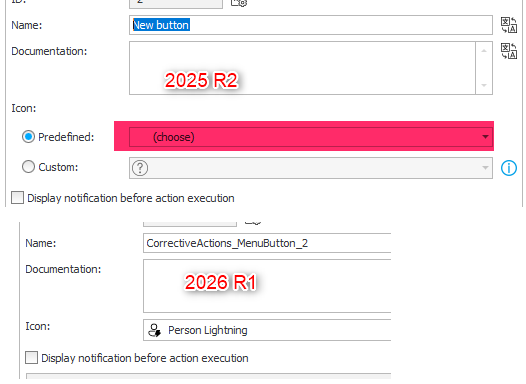
Predefined option has been removed.
Download
You can find a version of the rules for WEBCON BPS 2026 R1 here.
Comments