Building Business Processes with WEBCON BPS – an expert guide: Part 7 - Parent Workflow - Starting sub workflows & monitoring column
Part introduction
This is the part 7 of my “Building Business Processes with WEBCON BPS – an expert guide” in WEBCON BPS. In the previous part we created the sub workflow to assign tasks to the workflow responsible. Our workflow item list may contain the same responsible multiple times, so we need to create another item list with the distinct responsible persons. This will be used to start the sub workflows. In addition the responsible persons item list will be used a dashboard.
Tip: If you are a seasoned WEBCON BPS Designer you can scroll through this text and look out for boxes like this one. These contain tips / summaries and the like. You may find some useful information without reading everything.
Responsible persons list
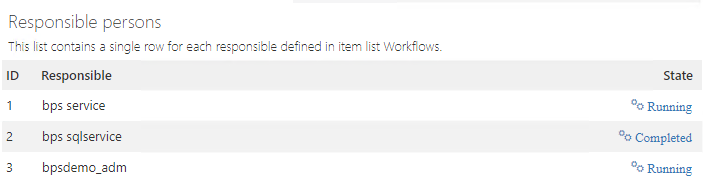
The responsible persons list is simple, we only need a field for the responsible. Since we want to use this as a dashboard too, we add two other fields, one for storing the workflow and one other, which will be used to show the current state and provide an option to jump into the workflow.
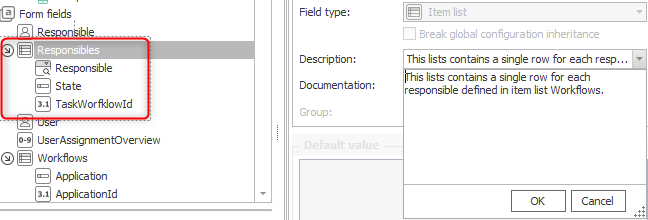
The state field contains dummy data and the TaskWorkflowId field is a marked as a technical field. Populating this field is easy, even so it looks funny.
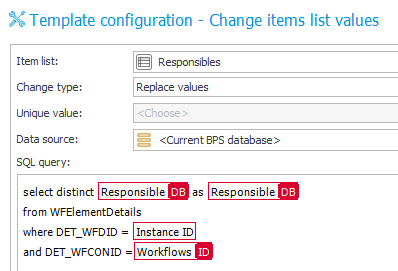
Remark: Don’t forget to filter for the item list id DET_WFCONID = ITEM_LIST_ID. If you have no other item list this will work without, but if another one will be added, you will get more data than you actually looked for.
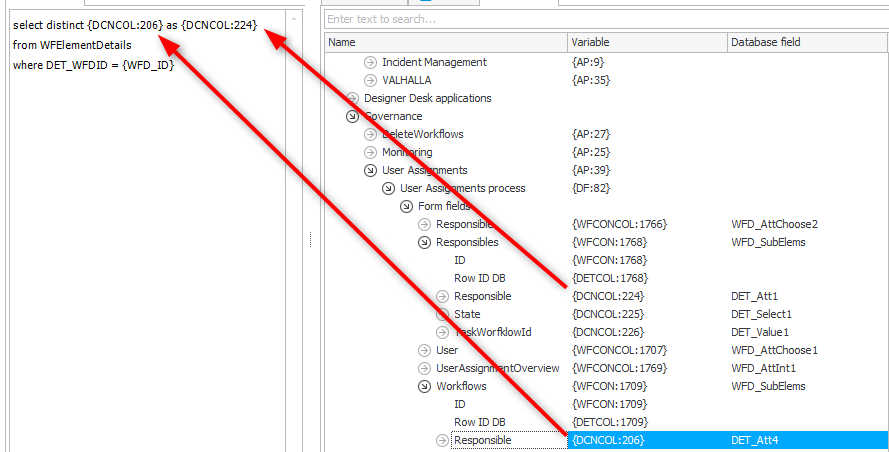
This is a case where I should have made use of an internal name, so these fields are better distinguishable. Switching to advanced mode helps here, too.
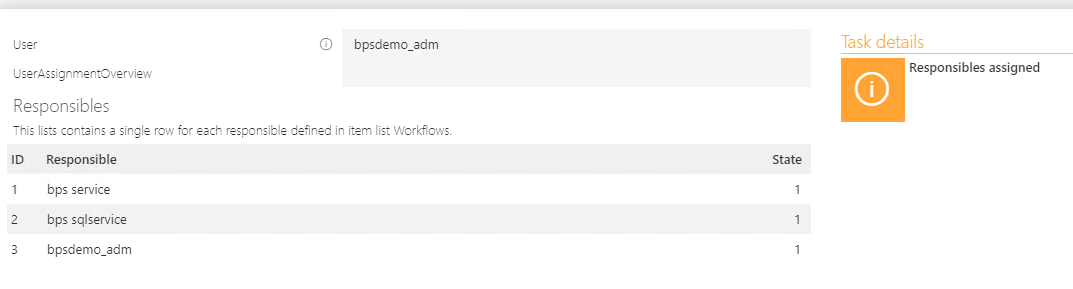
Once the action is executed, we have a small list whit the unique responsible persons.
Linking parent and sub workflow
Parent and sub workflows are linked by assigning the instance id WFD_ID of the parent workflow to the column WFD_WFDID of the sub workflow.
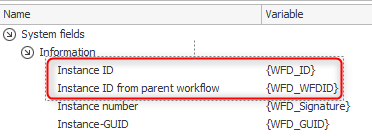
This is fine for most case, but I prefer to add an additional technical field in which I store the id of the parent workflow. This is applies also to the parent workflow itself.
There are two reasons for this
- If there’s a hierarchy of workflows I can easily identify them.
- A common field makes it also easier in reports.
Tip: If you have a workflow hierarchy create one technical column for each parent in the hierarchy. If you have Grand Parent > Parent > Child create GrandParentWFId and ParentWFId and populate them. This will help you in the future, even if you don’t know it yet. :)
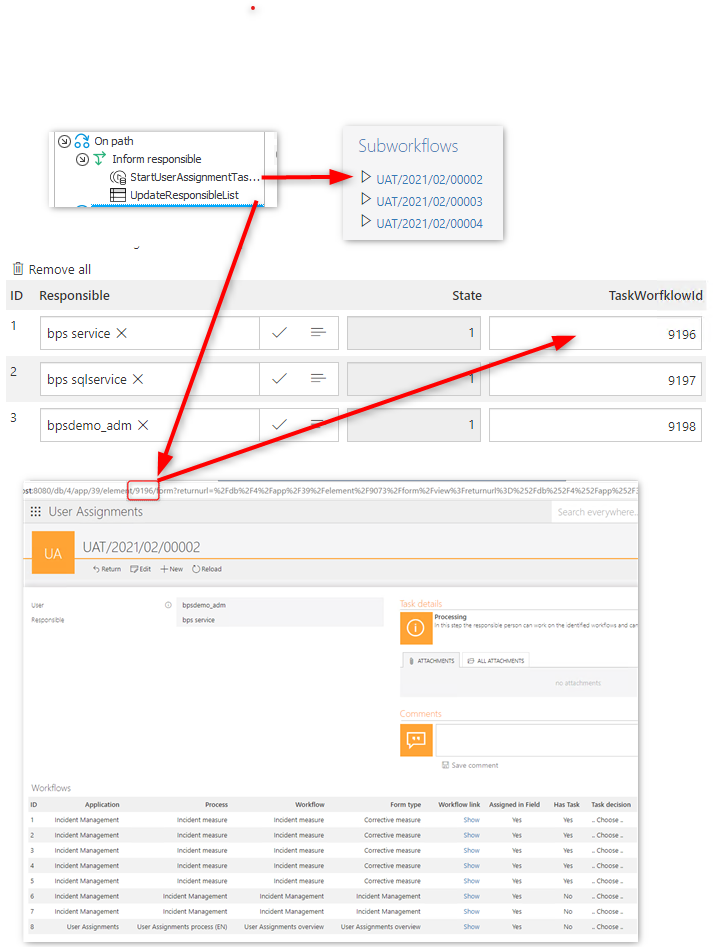
Starting sub workflows
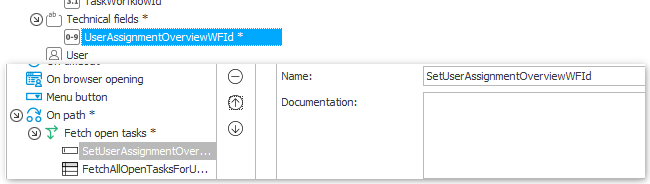
It’s time to start our sub workflow for each row in the responsible persons list. Therefore, we use the Start a sub workflow (SQL)) action. We need to store our responsible and copy over the value from our own parent workflow id and user field.

Tip: If you are starting a sub workflow you should always choose Business entity dynamically and select the business entity of this workflow instance. Even if you don’t have multiple business entities yet, this may change. I don’t want to be in your place if you selected a fixed value here, when it’s not absolutely necessary.
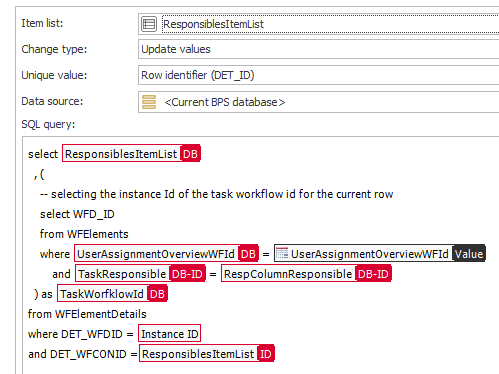
Since we want to turn our parent workflow into a dashboard, we need to update our responsible persons list with the created task workflow ids. This is achieved by getting the WFD_ID for each sub workflow and assigning it to the responsible column of the item list. In the meantime, I changed the internal names, which makes it easier to read. :)
In the sub workflow we need to add another action to retrieve the workflow rows for the current responsible. In this case we don’t need to map the source columns to the target columns, they are the same.
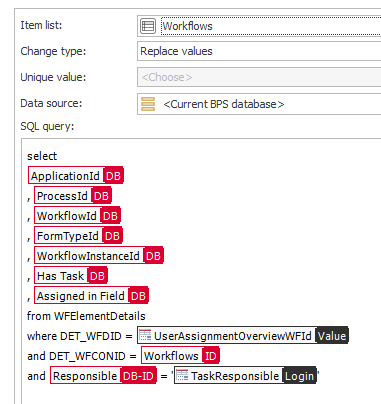
This action is added to the Assign path, which is executed by the start sub workflow action. Once we start the sub workflow creation the following will happen:
- the sub workflow task will be created
- the workflows rows will be copied over
- the responsible persons list will be updated whit the created workflow id
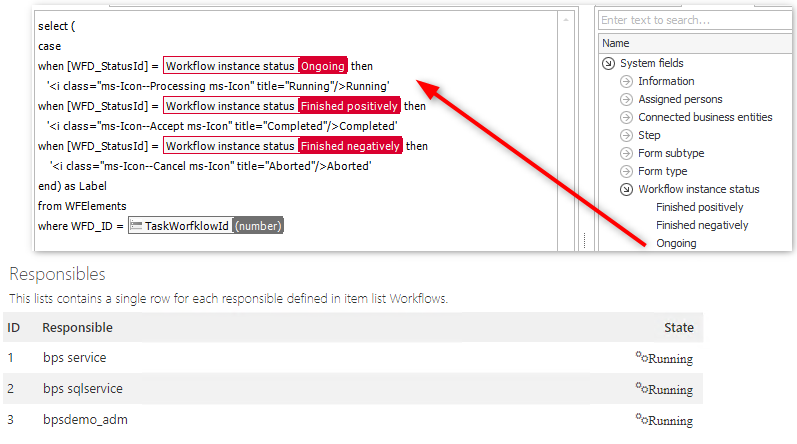
Adding monitoring column
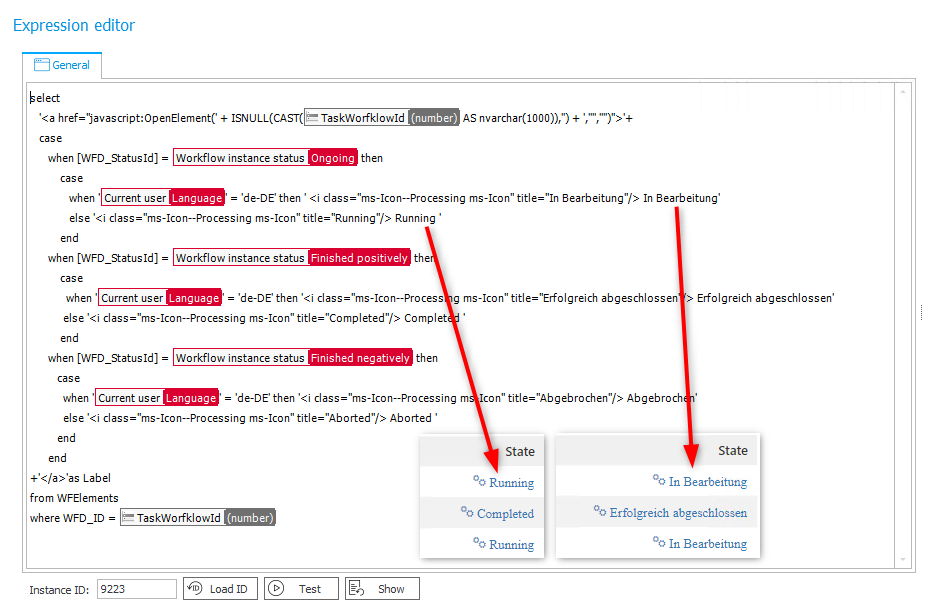
The responsible persons list should be used as a simple dashboard to get a quick overview if a sub workflow is finished. We will achieve this by using our created data row column. The first step is to check the state of the task workflow, which is stored in column WFD_StatusId. If we add an icon in addition to the text will make it easier for the user to understand. This can be achieved by using Office UI Fabric icons.
Remark: A subset of the Office UI Fabric icons are included with BPS Portal. You should verify if the icon exists is part of the BPS Portal version, before using it in multiple places.
The next step is to make the text into a link which will open the sub workflows. The easiest way to do this is to look at the build in function Open Element in the expression preview.
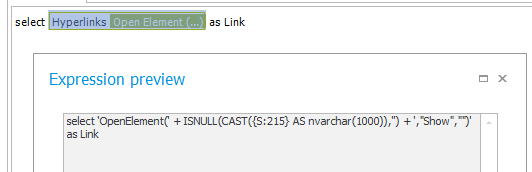
Open Element creates a JavaScript call.
We can copy this over into our field and wrap our case inside an a element which calls the Open Element function.
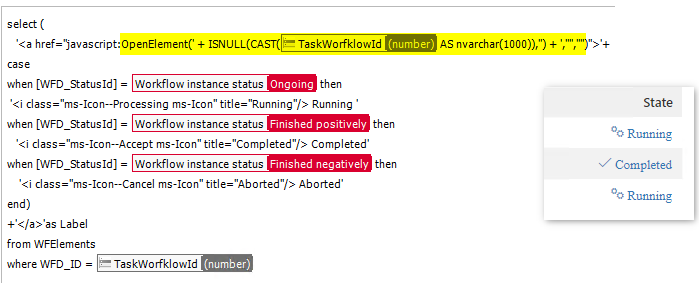
The final step is to make the text multilingual. This can be achieved by adding a case statement to determine the language of the current user and provide an appropriate text.
Tip: You can resize the expression editor dialog, which helps to make the SQL statement more readable.
Tip: If you are only interested in the language (English) and not in the localization (British/American) you should either use a SUBSTRING('{USERLAN}',1,2) = 'en' or '{USERLAN}' like 'en-%.
Translations and spell checking
This completes the functionality of the user assignments process, but we are not quite there yet. We haven’t provided many translations for our created objects. We can mass update these using the Translation tool. After providing the necessary data, selecting the process and language an excel files with values in the selected language is created.

Remark: This tool accesses the database directly, so the account executing the .exe needs to have at least datareader and datawriter permissions for the database.
The excel file contains a whole bunch of sheets, one for each different object type.
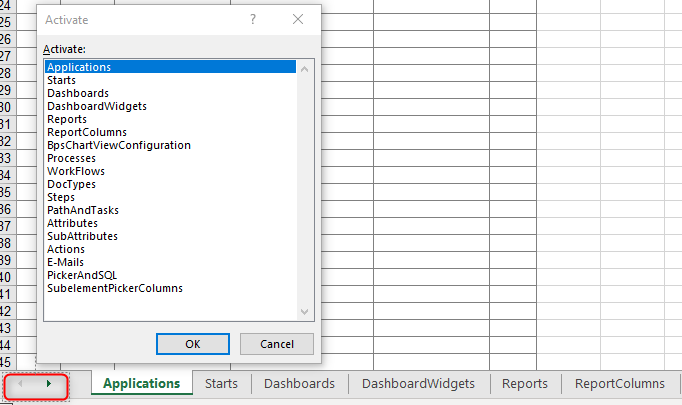
Tip: If you right click on the arrows for navigating the sheets, you can bring up a dialog to quickly select the wanted sheet.
The column Value (E) on each sheet contains the value displayed in the designer while column F contains the translation for the selected language.
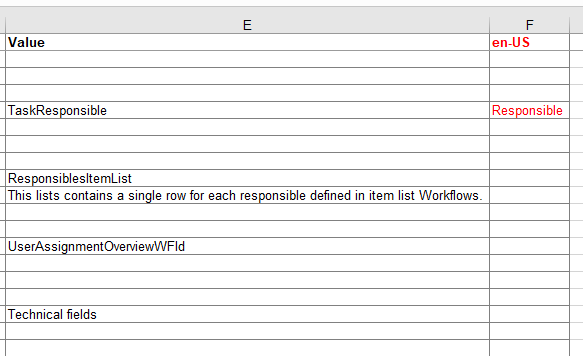
Tip: In most cases I don’t provide a translation for the language I use in Designer Studio, therefore I copy the Values from column E to column F. It doesn’t matter that the format gets lost.
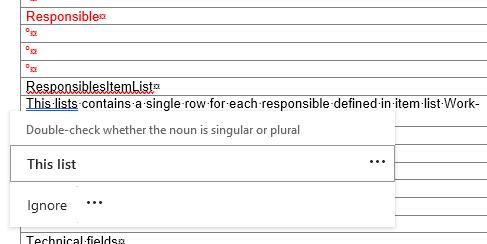
While excel is a good option for transferring the data and manipulating it, it’s no good for spell checking. This is a task for Word, so copy the column over to word, correct the text and copy it back to excel.
Remark: If your texts contain line breaks, for example in task description, this will create some additional work. If you copy a cell with a line break to Word it will create one row for each line break in the cell. After you have copied it back to Excel you need to make sure that you merge the texts again into one cell. So copy the text from one cell to the above, delete the cell with Shift cells up. In the end column F should have exactly the same number of rows as the other columns.
After importing the file using the Translation tool, the translations will be immediately available.
Remark: Whenever I use this, I make sure to close the Designer Studio. This may prevent that the updated translations will be overwritten. I’m not sure that this would happen, but I prefer to play it safe.
The end
This was the final part for of the series and I hope that you got a few tips/confirmations here and there. In case you are interested in the process you can download it here and make it your own. For example, by adding these features:
- If a workflow was listed because there was a task it could be checked, that the selected user is the only one. If there’s another one with a task, the workflow could be omitted. At least for processes which don’t require that all users completed the task. :)
- Add an option to select which applications should be ignored
Part overview
- Introduction and Use Case
- Parent Workflow- Prototype implementation using the Designer Desk
- Parent Workflow - Prototype changes and task retrieval
- Parent Workflow - Identify workflows by selected user
- Parent Workflow - Getting translations & supervisor
- Sub Workflow - User assignment task
- Parent Workflow - Starting sub workflows & monitoring column
Download
You can download the application from here.
Comments