Building Business Processes with WEBCON BPS – an expert guide: Part 5 - Parent Workflow - Getting translations & supervisor
Part introduction
This is part 5 of my “Building Business Processes with WEBCON BPS – an expert guide” in WEBCON BPS. In the previous part we have identified all workflows which store the selected user in a person field. This completed the retrieval of the workflows and it’s time to turns those object ids to text.
Tip: If you are a seasoned WEBCON BPS Designer you can scroll through this text and look out for boxes like this one. These contain tips / summaries and the like. You may find some useful information without reading everything.
Retrieving translations of WEBCON BPS elements
Distinction between translations types
There are two translations types. These are user interface content and object translations. The latter are used when an application, process or anything else is translated, which we are going to use. The first one is used for fixed elements in the user interface. For example, the save button in Designer Studio. You can find more information here: Translation of WEBCON BPS Portal user interface content
Internal working of object translation
As we already seen here WEBCON BPS objects can have translation. They have an internal name and for each language an additional one can be provided. Sometimes it’s necessary to retrieve the translation of an object at runtime. Ok it’s not necessary, but it’s more user friendly if you don’t display your internal name to the user especially if you have translations for it. In our case, we have the ids of the application, process, workflow and form type and want to display the translation of these elements to the user.
The translations are stored in the table Translates, but you won’t get very far with this table alone:

Every table has an _ID column which is the key of the table, but what are these other columns:
-
TRANS_LANID points to the table TranslateLanguages where we have a mapping of languages to an id
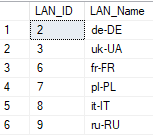
Explanation of column TRANS_LANID - TRANS_OBJID is the id of the object which translation we want to retrieve. But since each id of each object starts with 1 there would be duplicates if there wouldn’t be some kind of distinction.
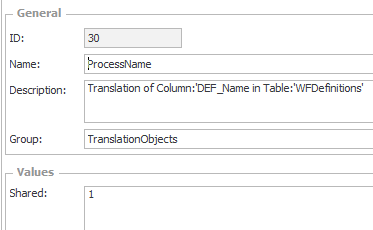
- TRANS_ELEMID serves this purpose. It defines the type of the object. But how do we know which id represents our application name? This information can be retrieved from the table DicTranslationsObjects.

Tip: WEBCON BPS has evolved over more than ten years to become what it is today. So there have been a few naming changes in the UI which couldn’t be reflected in the core of the system. Two obvious ones are Process, which have been Definitions, and Form Types, which were Document Types at some point in time.
Tip: If you see an integer value and it looks like it should have a meaning, your first bet is to look at Dic* tables. Dic is the abbreviation for dictionary where you may find a mapping of the integer to a meaningful name.
Getting translations via Business Rules
So, we have the translation but how do we make use of them. We need a data row
to our item list. With this we will retrieve the translation for our object. We could write our query there,
but this would be a waste. Getting translations this seems like something which can be reused, and
this is where Business Rules come in. They allow us to create a rule which we
can use again and again. Business Rules can be defined on process level or
global, which allows to use the rule everywhere. Overtime there will be a lot of
rules. Using groups will help you getting a better overview of your rules.

Since a Business Rule is there to be reused, parameters can be provided. After looking into the dictionary table we know that the ids of Application name and Application description are 51 and 52. We can add these information in the description of a parameter.
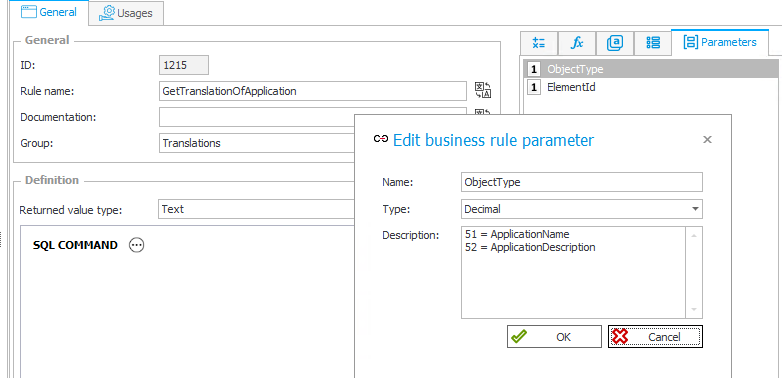
Remark: You will see the description of the parameter only when you edit the rule and nowhere else.
The parameters can be used inside an expression like any other variable.
Even so these are fixed values I tend to create constants for those, which I will group, too.
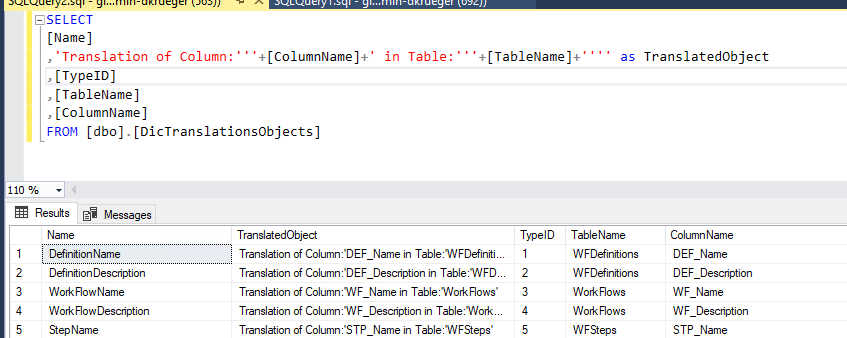
I created query to create the constants by copy & paste:
SELECT
[Name]
,'Translation of Column:'''+[ColumnName]+' in Table:'''+[TableName]+'''' as TranslatedObject
,[TypeID]
,[TableName]
,[ColumnName]
FROM [dbo].[DicTranslationsObjects]
These constants can be used in the expression editor as well as in the parameter mapping window, which is shown further below.
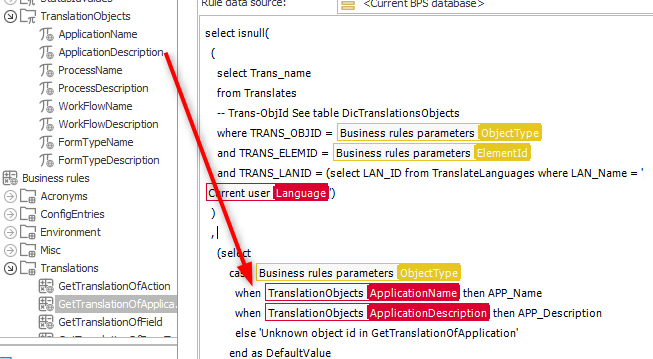
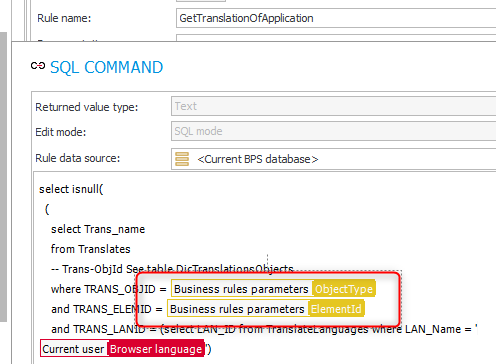
An example SQL statement for retrieving a translation of a application with a fall back if no translation has been provided.
select isnull(
  (
    select Trans_name
    from Translates
    -- Trans-ObjId See table DicTranslationsObjects
    where TRANS_OBJID = OBJECT_TYPE_PARAMETER
    and TRANS_ELEMID =  ELEMENT_ID_PARAMETER
    and TRANS_LANID = (select LAN_ID from TranslateLanguages where LAN_Name = '{USERLAN}')
  )
  -- Fallback if no translation exists
  ,
    (select
        case OBJECT_TYPE_PARAMETER
          when 51 then APP_Name
          when 52 then APP_Description
          else 'Unknown object id in GetTranslationOfApplication'
        end as DefaultValue
      from WFApplications
      where APP_ID = ELEMENT_ID_PARAMETER
  )
) as Translation
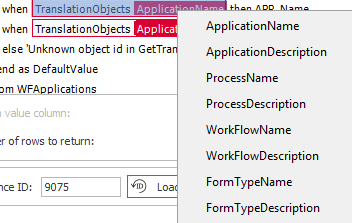
Tip: Grouping objects has one other benefit. If you right click on the group name, you can select one of the group members.
Using Business rule in a data row column
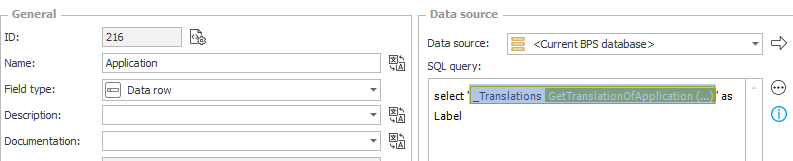
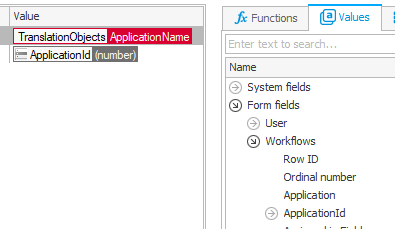
All that’s left is to add a new column to the item list of type data row, write
a simple SQL query select '' as Label and put the business rule inside the
single quotes.
The parameter mapping of the Business Rule can be opened with a right click. What’s important to note here is the following, we need to fetch the correct translation for the current row. WEBCON BPS makes it easy for us. If we expand the workflows item list field, then we see all the defined fields and if we use one field, it will automatically refer to the value of this row at runtime.
Remark: If we use information from an item list, we can’t test it in Designer Studio. The Designer Studio only loads data for a workflow and not for an item list row.
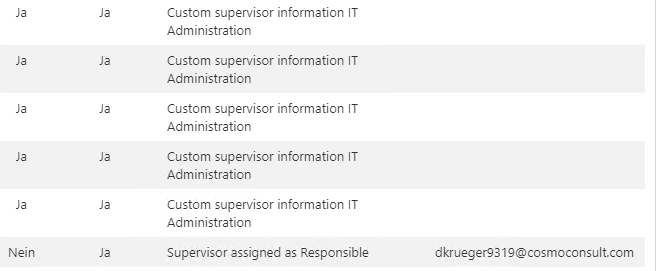
The result looks like this:

We no longer need our ids so we can hide them, but we shouldn’t do this via the
field matrix. Instead, we make use of the Technical column attribute.
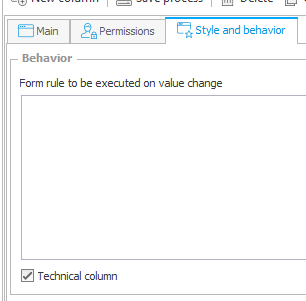
Technical columns allow us to hide unnecessary information for the normal user (1) and display it when necessary via the admin view (2) which is toggled via the admin button (3) in the menu bar.
Tip: Technical columns are hidden from the normal user, but only if they are marked as visible. If the column would have been hidden via the field matrix it wouldn’t have be available at all.
Tip: A group of fields, a field, item list and a column can be declared as technical. If you declare parent object like group or item list as technical, this will be applied to all child elements even so they don’t have the flag.
Retrieving supervisor
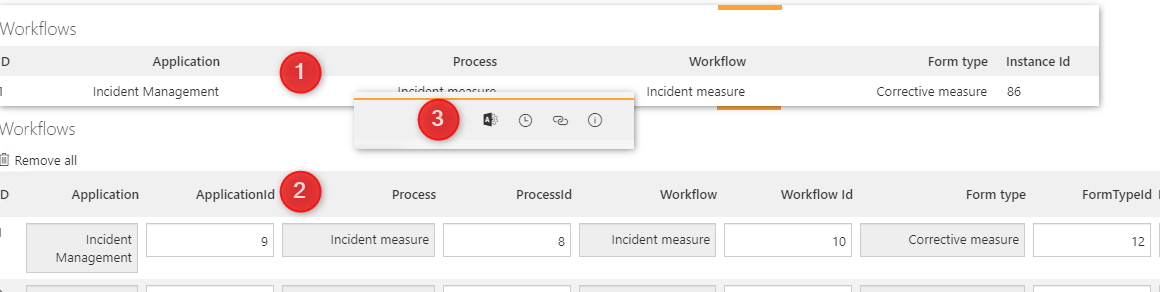
There’s not much to tell here. We need to update two fields of the item list. So we prepare the statement (1) and will add the retrieval of the wanted information in a second step (2).
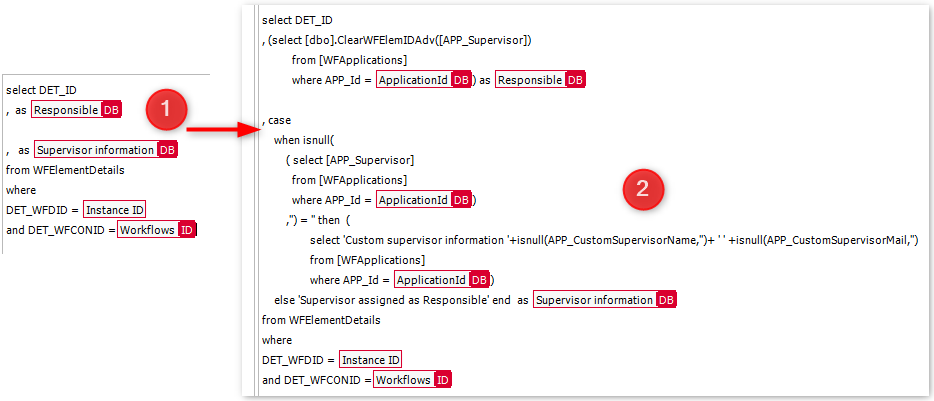
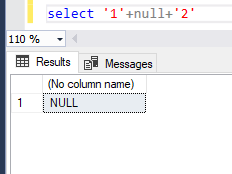
Remark: You should always check for null, otherwise you will be surprised.
Because select '1'+null+'2' will return null.
This action is executed on the transition to the next path.
Tip: If you populate columns with a complex logic, your users and yourself will be glad, if you provide some kind of information why a specific value has been set.
Remark
There’s room for improvement. We did not check the fields in item list and groups are ignored too. The latter shouldn’t be a problem since we can easily check the BPS Groups and the AD groups won’t contain the user anyway. The item lists should be checked but there’s nothing new to tell so I omitted it. It will be included in the downloadable application.
Continuation
At this step we achieved everything which was necessary for the parent workflow.
- We need to fetch the workflows where a person is involved based on the above requirements.
- We need to get the application of these workflows to get the supervisor.
What’s left is to inform the supervisors. For this we will create one sub workflow for each supervisor and copy over all workflows which needs to be checked. Afterwards we can come back to the parent workflow to create them.
Part overview
- Introduction and Use Case
- Parent Workflow- Prototype implementation using the Designer Desk
- Parent Workflow - Prototype changes and task retrieval
- Parent Workflow - Identify workflows by selected user
- Parent Workflow - Getting translations & supervisor
- Sub Workflow - User assignment task
- Parent Workflow - Starting sub workflows & monitoring column
Download
You can download the application from here.
Comments