Building Business Processes with WEBCON BPS – an expert guide: Part 6 - Sub Workflow - User assignment task
Part introduction
This is part 6 of my “Building Business Processes with WEBCON BPS – an expert guide” in WEBCON BPS. In the previous part we added data row columns to load the translation of objects at runtime and retrieved the application supervisors. In this post we will create the sub workflow for handling the identified processes.
Tip: If you are a seasoned WEBCON BPS Designer you can scroll through this text and look out for boxes like this one. These contain tips / summaries and the like. You may find some useful information without reading everything.
Creating Task workflow
Purpose
The parent workflow, User Assignments Overview, listed all workflows where the selected user is involved. In addition, for each row a responsible must be selected. If applicable, this is the application supervisor. Based on this data, we will create one task workflow for each supervisor. This task workflow will be assigned to the responsible and will list all workflows. The task workflow responsible can define per row if the referenced workflow was changed or if no change is necessary.
Steps and paths
There are only a few steps of the task workflow. We need a step for initialization, which can be used to copy non item list data from the parent workflow. From there the workflow will automatically be transferred to Processing. During the transition, all rows will be copied. In step Processing the responsible can work on the listed workflows. Finally, it will be moved to completed.
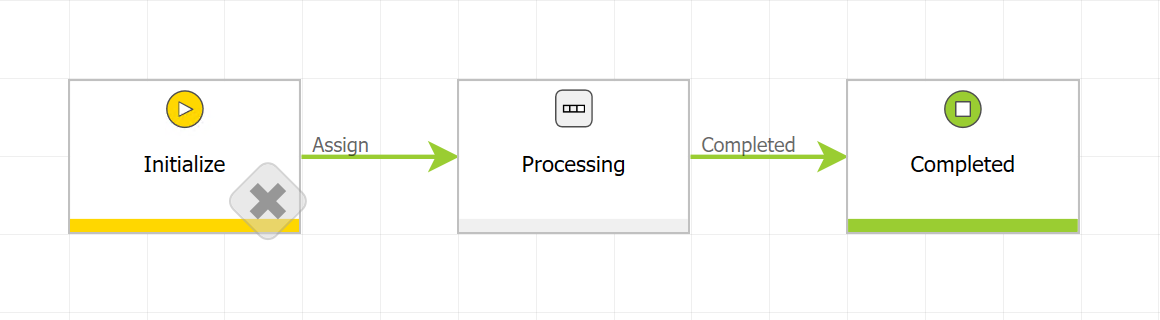
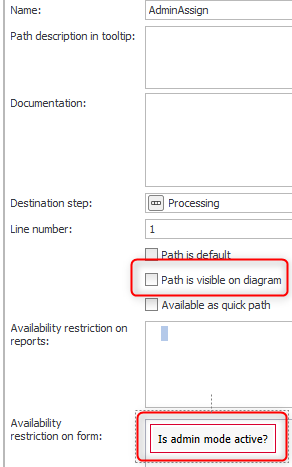
This workflow is intended to be used as a sub workflow. Nevertheless, we need to test the sub workflow without the parent workflow. Therefore, I added a hidden AdminAssign, which doesn’t execute any actions on transition, and ‘Save’ path which is only visible in administration mode and not displayed on diagram.
Using the admin mode (1) we can enter test data. It helps that we defined the Id fields as technical fields instead but are still visible, otherwise we couldn’t enter test data (2). The workflow is saved using a hidden admin path (3).
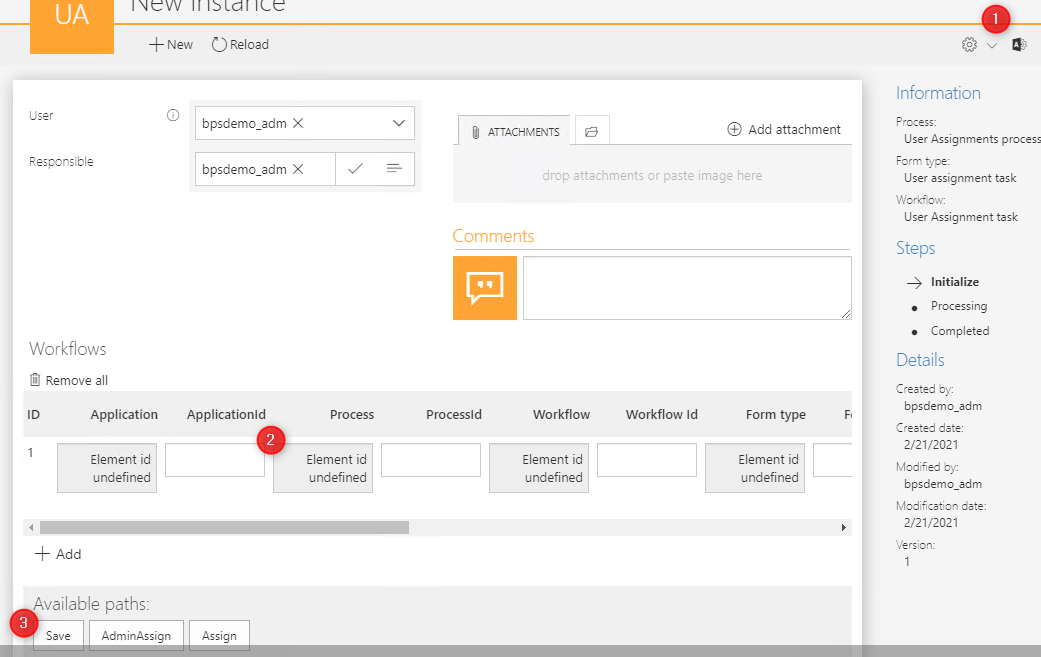
Tip: It’s easier to debug a saved workflow. Once it’s saved you can use the workflow history. Therefore, add at least a save path which is only visible in admin mode.
Fields
We can reuse most of the fields from the parent workflow. The only new fields are a responsible (1), the ‘workflow link’ (2) and ‘decision fields’(3) for each workflow row.
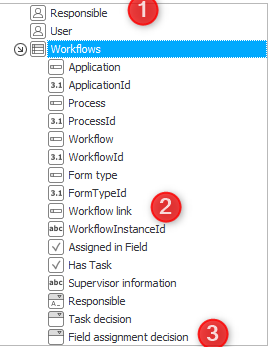
The new field and columns aren’t visible for the parent workflow. While the responsible field is a simple Person or group field the ‘workflow link’ is a data row and the decision fields are choice fields with a fixed set of options.
Multilingual open workflow link
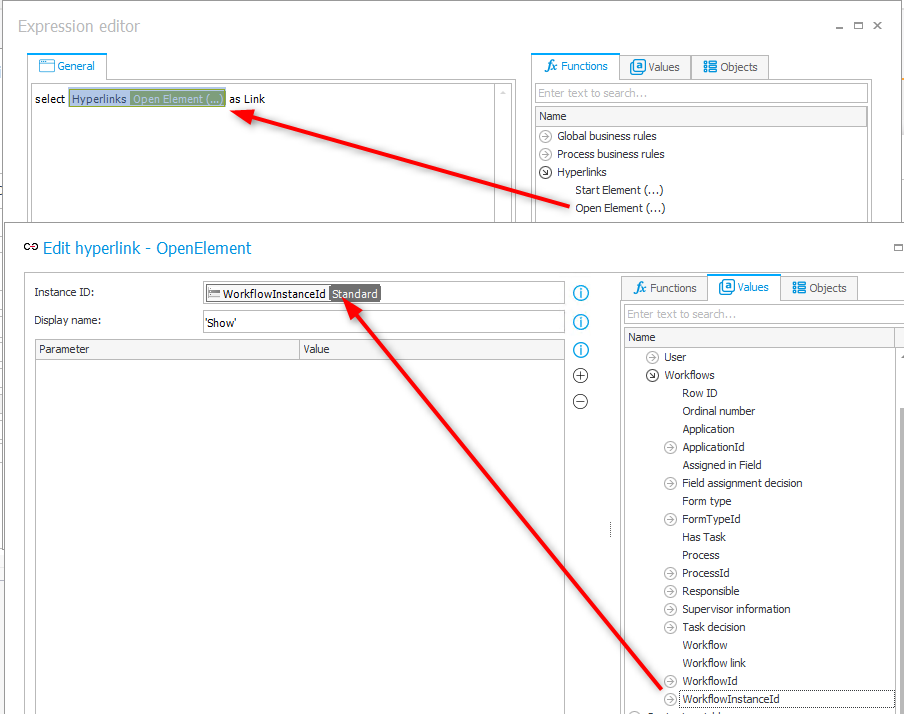
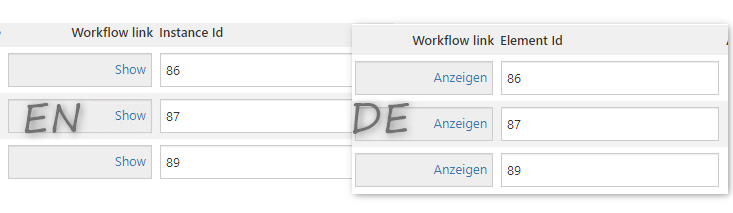
The ‘workflow link’ field is a data row which uses a default function (1) to create a link to another instance. We only need to assign our data row column containing the instance id to the parameter (2).
The only drawback is that we can’t provide a translatable Display name. This can be fixed by creating a custom business rule.
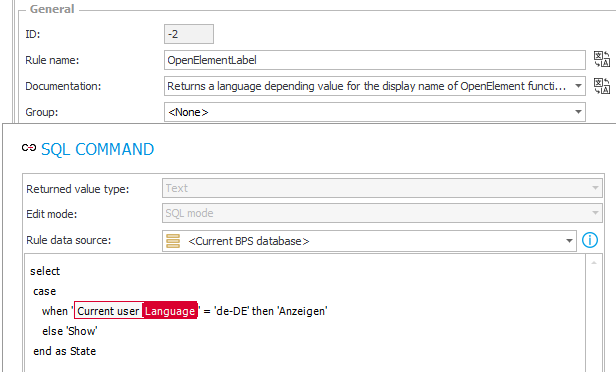
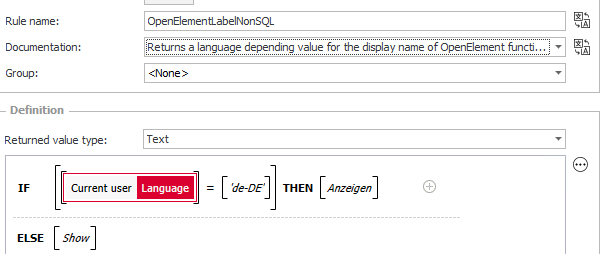
We can use this rule as a value for Display name, we only need to make sure that it is encapsulated in single quotes.
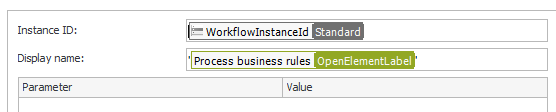
The result is a language specific link depending on the BPS Portal language selected by the user.
Decision fields
The decision fields are used to flag if a row has been worked on and with which result. Either it was necessary to change something, or it wasn’t.
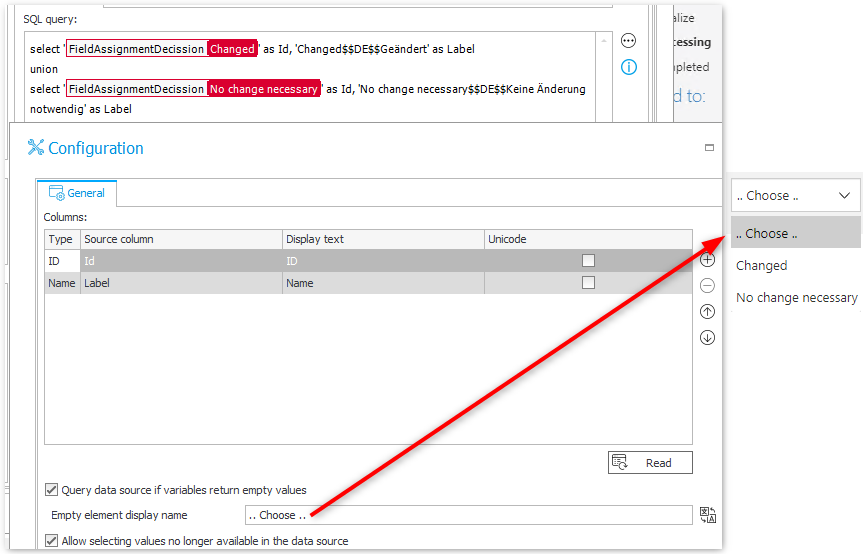
The image above contains three useful information
Tip 1: A choose field with a fixed number of options can be created by either using a fixed value list, like in the image below, or using an SQL statement. In the later case we can simply write the select statements and combine the rows with a union.
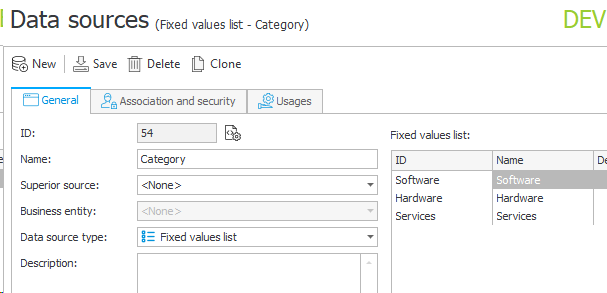
Tip 2: If you don’t have to hard code something, don’t do it. You should use constants instead. You can make use of the Usages tab to locate every place where a specific constant is used. The number of locations will increase over time. At least if the value isn’t just informational, but it’s involved in some logic. Even if there’s no logic yet, it will be added. This is the reason why I don’t make use of fixed value lists.
Tip 3: By providing an “Empty element display name” we can have an additional value in the drop down. It is used if the value of the fields hasn’t been set (it is null). In combination with defining the field as required this can be used to force a user to make a conscious decision, which is not possible with a simple boolean field.
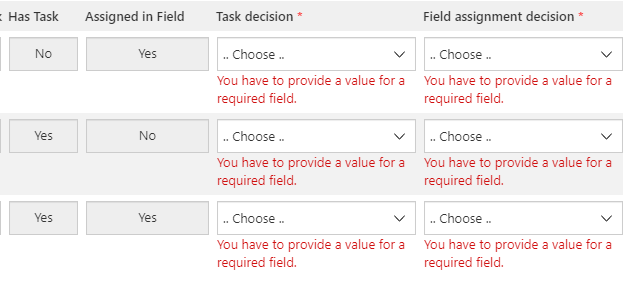
Conditional required fields
It’s necessary that for each row the decision fields need to be set, before the workflow can be moved to the completed step. Since there are two fields, we have three different cases, why a workflow could have been added to the item list. Either the user is assigned in a field, he has a task or both. Depending on the checked field a value in a decision field is required.
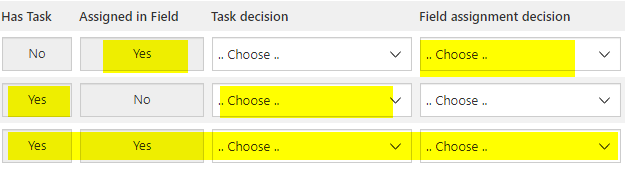
Due to this we can not simply set the field as required, this would result in false errors.
This can easily be fixed by setting up an appropriate Column requireability restriction in the permissions tab of both fields.
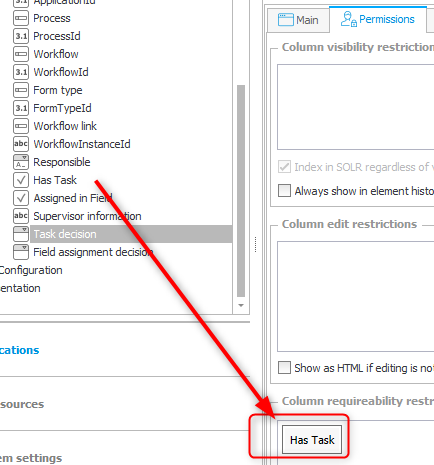
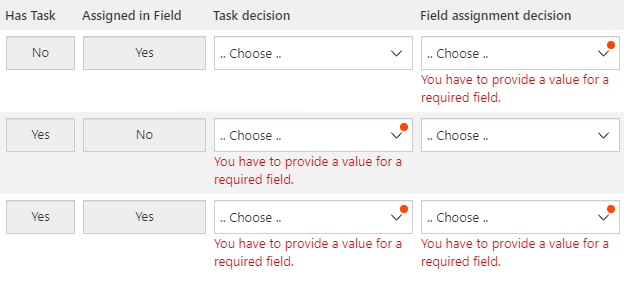
Remark: The field matrix defines the field/column as required. If the field is not required in field matrix, these settings is ignored.
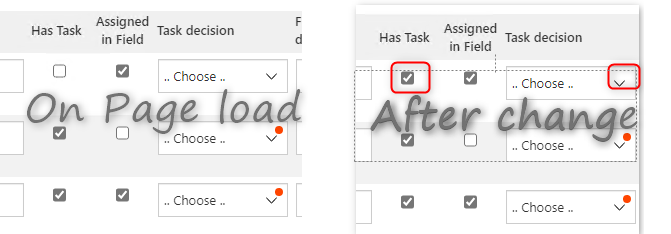
Tip: The Column requireability restriction is evaluated on page load. For example, changing the value of Has task won’t change the required behaviour. This only applies to item list columns.
Tip: If a field is used in a restriction rule and this rule should be evaluated without saving, the Value change will cause default... box needs to be checked on this field. So, if you have a field which visible/editable/requiredness state depends on another field you need to do three things:
- Define the availability for this field in the field matrix
- Define the restriction for this field
- Check the
Value change will cause default...box on the other field
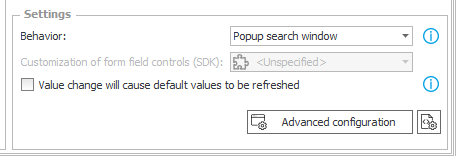
Value change will cause default... causes a evaluation of all restrictions like Requiredness restriction
Continuation
This is all what our sub workflows needs to do. What’s left is to start the sub workflow from the parent workflow and build a ‘dashboard’ inside the parent workflow.
Part overview
- Introduction and Use Case
- Parent Workflow- Prototype implementation using the Designer Desk
- Parent Workflow - Prototype changes and task retrieval
- Parent Workflow - Identify workflows by selected user
- Parent Workflow - Getting translations & supervisor
- Sub Workflow - User assignment task
- Parent Workflow - Starting sub workflows & monitoring column
Download
You can download the application from here.
Comments