Automated UI Tests for WEBCON BPS - Part three data generation
Overview
This is the third post of my series Automated UI Tests. My goal of this series to make it easy to create tests with Playwright for WEBCON BPS. Since there’s still a lot of work, I will only cover the changes to the last post.
You can read up on the previous post using the tag Automated UI Tests.
The main focus this time wasn’t Playwright but a little side project. I wanted to get rid of the manual creation of the FormData definition. This defines:
- The layout of the form and fields.
- Which value a field has / should have.
- Whether the value should be set or whether it should only be tested, that it exists.
You may wonder, why would I do this, when there are only a few field types supported at the moment. But this is exactly the reason. I don’t want to modify the FormData every time on my own. :)
This video will show you how it works.
Form data generation
General
The form data defines the available fields on the form, how it’s named, the value of the field etc.
 new FieldDefinitions.TabPanelField("New tab panel", 1023, [
      new FieldDefinitions.TabField("General", 1026, [
        new FieldDefinitions.TextField("Title", "AttText1Glob", "Some title", {
          isRequired: false,
          editability: FieldDefinitions.FieldEditability.ReadOnly,
          visibility: FieldDefinitions.FieldVisibility.Visible,
          action: FieldDefinitions.FieldActionType.CheckOnly,
        }),
        new FieldDefinitions.MultiLineTextField(
          "Description",
          "AttLong1",
          "Yes, it's approved.",
          {
            isRequired: false,
            editability: FieldDefinitions.FieldEditability.ReadOnly,
            visibility: FieldDefinitions.FieldVisibility.Visible,
            action: FieldDefinitions.FieldActionType.CheckOnly,
          }
        ),
      ]),
Since we have all the information already available, I wanted to create a solution to generate this Form data. There have been two options:
- Create a script which needs access to the database
- Use the REST API
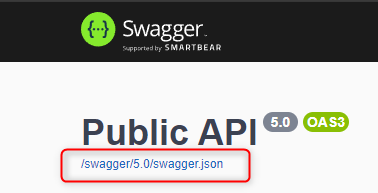
I’ve chosen the API approach which I regret a bit. The reason for this is, that I wanted to use PowerShell classes and generate these classes using the swagger.json, which defines all classes for the REST API. This took far longer than expected.
Anyway, it’s now possible to:
- Define the database and workflow.
- With this information you can generate an Excel file to define the data for the steps.
- Generate the
Form datafor all steps using the Excel file.
Remark: Currently only a limited number of field types are supported. I didn’t add any more field types in this iteration.
Authentication
This approach uses the REST API. If you don’t know what this is, you should read the official documentation.
If you are already familiar with it, these are the steps you need to take:
- Create a a new application from the admin panel https://hostname/adminpanel/apiApplications
- Create a secret for the application and note it down.
- Grant the application permission (scope)
App.Metadata.Read.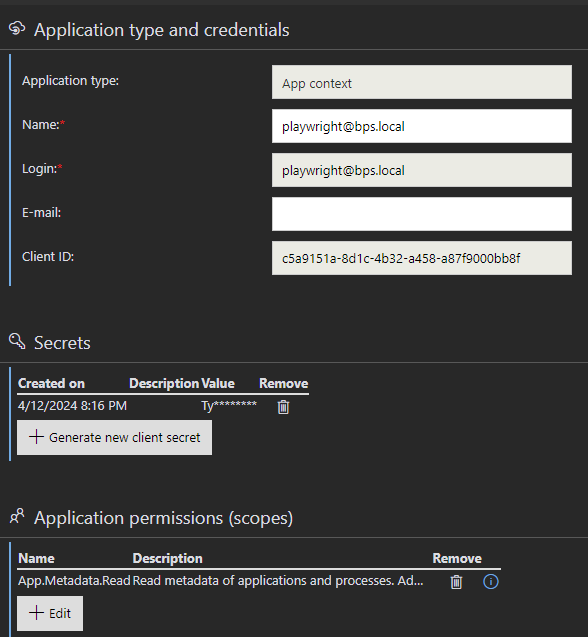
Application definition - Assign the application to the
Metadata accessprivilege of the applications using Designer Studio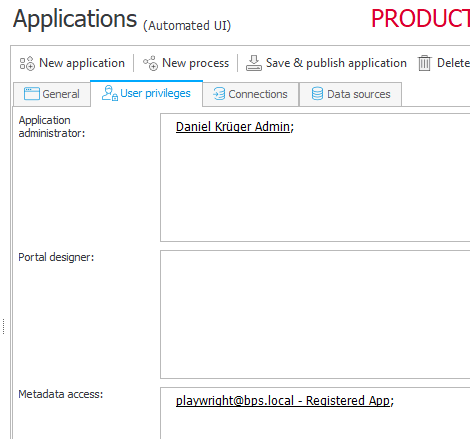
Metadata access privileges for the application
Afterwards you can head over to the Playwright folder. There’s an .auth folder in which you can add a webconconfig.json file and add the following content to it.
{
  "ClientId": "Your client id",
  "ClientSecret": "Your secret",
  "Hostname": "https://y.xyz.de",
  "ApiVersion": "v5.0"
}
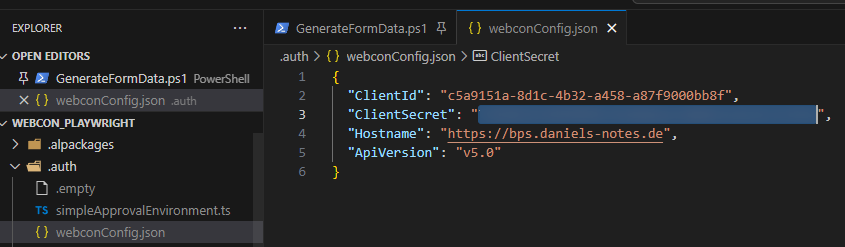
Remark: The .gitignore file defines a rule which ignores all files in the .auth folder except the .empty file. So, it is relatively save to use it in GIT repository without leaking the secret.
Generating the input file
The input file is generated by the GenerateInputFile.ps1 in the PowerShell folder.
The most important information is, before executing the script, change the current directory of the PowerShell session to PowerShell. If you are in VS Code you simply execute these lines:
$currentDirectory = Get-Item -Path .
if ($currentDirectory.Name -ne "PowerShell") {
    Set-Location .\PowerShell
}
Afterwards you can modify the variables and you can execute the script.
$dbId = 14
$workflowId = 78
$targetFile = "..\e2e\input.xlsx"
$workflowInformation = [WorkflowInformation]::new($dbId, $workflowId)

New-ExcelInputFile -workflowInformation $workflowInformation -targetFile $targetFile -overwrite $false -showFile $true
This script utilizes the great PowerShell module ImportExcel which doesn’t use Microsoft Excel and therefore it’s really fast and flexible. If you run the script the first time the module will (should) be installed automatically.
At the moment the file will consist of a single worksheet FieldInformation. There will be one column for each field and one row for each step.
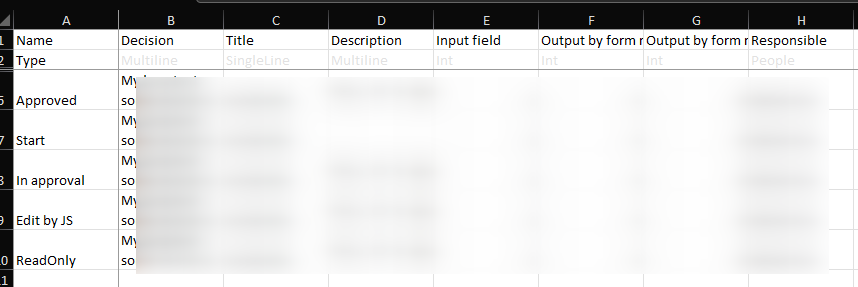
Info: The values are masked, to focus on the important information, not because the data is secret.
Ok, some field types and steps are ignored. These are defined in the UtilityFunctions.psm1.
$fieldsToSkip = @(
            [WebconFieldTypes]::Unspecified,
            [WebconFieldTypes]::Comments,
            [WebconFieldTypes]::AttributesGroup,
            [WebconFieldTypes]::Tab,
            [WebconFieldTypes]::TabPanel)
$stepsToSkip = @(
            [WebconStepTypes]::SystemWaitingForScan,
            [WebconStepTypes]::SystemWaitingForOtherWorkFlow,
            [WebconStepTypes]::FlowControl,
            [WebconStepTypes]::SystemWaitingForTextLayer,
            [WebconStepTypes]::SystemWaitingForOcrAi,
            [WebconStepTypes]::SystemWaitingForOcrAiLearn,
            [WebconStepTypes]::SystemStart)
After the file is generated, it will be displayed by default and you can define which value a field should have in which step. Please make sure that decimal field is also of type decimal in Excel and not text. Otherwise, this may cause problems.
Remark: Make sure that you save the modified file under a different name, or you may lose your input.
Generating the form data
This script requires a $targetFolder in which the form data files should be placed. Below this folder, the following structure will be generated:
- Workflow
-
- Step 1
-
-
- formdata.ts
-
-
- Step 2
-
-
- formdata.ts
-
-
- Step 3
-
-
- formdata.ts
-
The rest of the script is really similar to generating the input file.
- Make sure the current directory is
PowerShell. - Update the variables.
- Execute the script.
$dbId = 14
$workflowId = 78
$targetFolder = "..\e2e\automatedUi"
$inputDataFilePath = "..\e2e\input_20240428.xlsx"
$workflowInformation = [WorkflowInformation]::new($dbId, $workflowId)
Export-FormData -workflowInformation $workflowInformation -targetFolderPath $targetFolder -inputDataFilePath $inputDataFilePath
Afterwards you need to define the pathId. Since a step can have multiple path, all of these are commented and you need to uncomment one. In case you forget it, you will get reminded of it, because the execution of the tests won’t be possible because the pathId is a required property.
export const data: IFormData = {
// pathId: 296, // Continue path visibility: Visible
Background information
PowerShell 7.x
The whole PowerShell script was written with VS Code and PS 7.x. This script won’t be executable from the old PowerShell ISE. It’ would be the best to us VS Code for it, also you also could install PS 7.x on you system and start a PS session using this version.
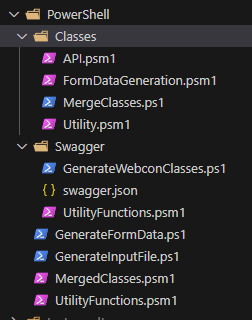
Folder structure
Placing the PowerShell files in a subfolder instead of the root directory caused a lot of problems. But I didn’t want to create a new repository for this. If you just want to use the provided scripts, you can ignore:
- Folder
Classes - Folder
Swagger - File
MergedClasses.psm1
Regardless of what you want to do, whenever you create a new PowerShell session, change the current directory to PowerShell before you do anything else. This can done by executing these lines from one of the Generate* files:
$currentDirectory = Get-Item -Path .
if ($currentDirectory.Name -ne "PowerShell") {
    Set-Location .\PowerShell
}
Afterwards you can start playing around.
PowerShell classes
I should have read about PowerShell classes before starting with them, they made this a lot more troublesome. For those of you who are interested I can recommend this blog post: https://blog.danskingdom.com/How-and-where-to-properly-define-classes-and-enums-in-your-PowerShell-modules/
Most of the trouble was caused by my lack of knowledge and these have been the pain points:
- I didn’t place may PowerShell files in the root folder.
- The using statement is relative to the current folder. I need to change the folder before the using statement is processed.
- Classes are loaded ones. If you change anything you need to restart the PowerShell session.
- Referencing classes from another file adds another level a complexity, which I didn’t solve correctly.
Even so I still hold on to my subfolder I created a script which merges the class definitions into a single file, which is then used by the actual script.
Generating classes from swagger
I went down the rabbit hole to use PowerShell classes, so I also wanted to use classes for the REST API. At the same time, I didn’t want to create these classes myself. Especially if there’s a swagger file available.
The classes are generated using the GenerateWebconClasses.ps1 script in the Swagger folder.
The most important lines are these:
# Variable prepartion so it's easier to debug
$resolvedDefinitions = [System.Collections.Generic.Dictionary[string, boolean]]::new()
$classInherits = [System.Collections.Generic.Dictionary[string, string]]::new()

# Actual code for generating the classes
New-WebconPowerShellClass -StartingDefinition "4.0.FormLayout" -Definitions $swagger.components.schemas -output $output -ResolvedDefinitions $resolvedDefinitions -ClassInherits $classInherits
New-WebconPowerShellClass -StartingDefinition "4.0.Step" -Definitions $swagger.components.schemas -output $output -ResolvedDefinitions $resolvedDefinitions -ClassInherits $classInherits
New-WebconPowerShellClass -StartingDefinition "3.0.AssociatedFormTypesCollection" -Definitions $swagger.components.schemas -output $output -ResolvedDefinitions $resolvedDefinitions -ClassInherits $classInherits
You can call the function New-WebconPowerShellClass for each top level class in which you are interested. The function will the iterate through all the referenced classes. You can repeat this multiple times before writing the classes to a file.
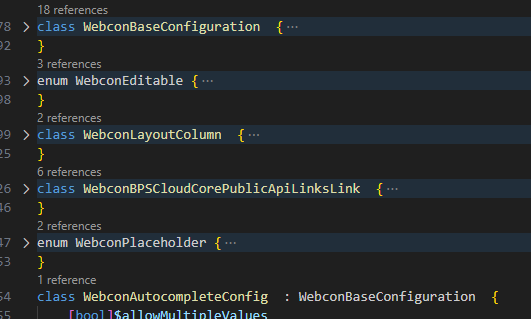
This is an example of such a generated class:
class WebconAutocompleteConfig  : WebconBaseConfiguration {
    [bool]$allowMultipleValues
    [bool]$allowTypedInValue
    [int]$numberOfResults
    [bool]$supportMultiLanguageNames
    WebconAutocompleteConfig () {
    }
    WebconAutocompleteConfig ([PSCustomObject] $json) {
        $this.Init($json)
    }
    WebconAutocompleteConfig ([PSCustomObject] $json, [scriptblock] $action) {
        $this.Init($json)
        if ($null -ne $action ) {
            Invoke-Command -ScriptBlock $action -ArgumentList $json, $this
        }
    }
    hidden Init($json) {
        if ($null -ne $json."allowMultipleValues") { $this.allowMultipleValues = $json.allowMultipleValues }
        if ($null -ne $json."allowTypedInValue") { $this.allowTypedInValue = $json.allowTypedInValue }
        if ($null -ne $json."numberOfResults") { $this.numberOfResults = $json.numberOfResults }
        if ($null -ne $json."supportMultiLanguageNames") { $this.supportMultiLanguageNames = $json.supportMultiLanguageNames }
    }
}
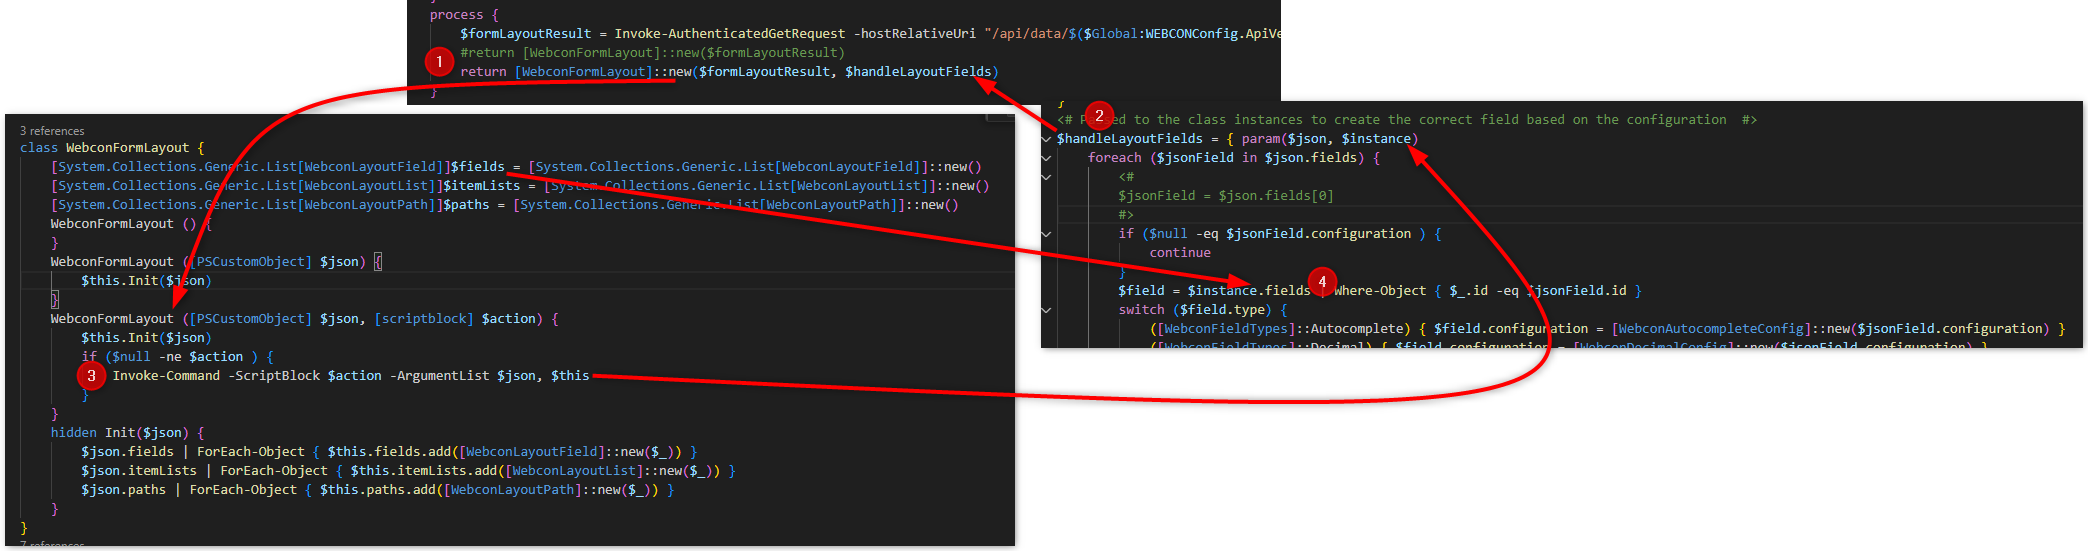
The classes have two constructors, the simple one will accept the json response of the API for this class. The second one will allow you to pass a script block to handle the JSON response for more sophisticated classes.
- The WebconFormLayout constructor is executed using the json response
- In addition a script block is passed to the constructor
- In the constructor this script block gets executed and the json as well as
$thisis passed. $thisis a reserved word which is the reason that I used the term$instance. Regardless of the name, I can access the properties of the instance and do something with the JSON.
In this example I initialize the correct configuration class for the field type.
I haven’t tested this in another scenario, but it could work out fine.
Outlook
These is the overview of the outlook I provided in the first post, and the completed ideas. Please understand completed as it seems to work but more testing under different circumstances would be required.
- Ensure positive transition was successful
- ✅ Enrich “Form data” to get the step title for a step id.
- Adding documentation to source code
- Azure AD authentication
- Field Support
- Choose dropdown
- Choose auto complete
- Date time
- Yes / No
- ✅ Integer
- Float
- Data table
- Data row
- ✅ Switching tabs
- ✅ Expand collapsed groups
- Value verification
- ✅ Values set by form rules
- ✅ Values set by form rules set by business rules
- Target fields of choose / autocomplete fields
- Item list support
- Test generated document content
- Test mandatory fields
- Submit workflow
- Verify field is part of error message
- Close dialog
- Modal dialog support?
- Menu button availability
- Path availability without execution
- ✅ Automatic creation of ‘Form data’ model
- ✅ JSON generation for a step
- ✅ Representing the form layout
- Person has an assigned task
- Open an element from a task list.
There’s no order, no roadmap and of course no timeline.
GitHub Repository
Remark: Before you head over to GitHub please read the Important information.
I’m using an own branch in GitHub for each post. These are called iteration x, where the x corresponds to the number of the post in this series.
Comments