JavaScript form rule execution on page load
Overview
In most cases the provided form rules are sufficient to achieve the required result. For the other cases you can still create a form rule with edit mode JavaScript mode.

The only ‘issue’ is caused by the ‘modern’ approach of generating the web page elements. In the old days everything was generated on the server and then send to the client. These days are gone for good. In todays world the elements are created on the client, once they are available and necessary. So, if we don’t know when specific elements are available, how can we do something with them? One example would be to display the All attachments on page load.

Those who followed my posts in the community will already have an idea, since I posted variations of my preferred solution:
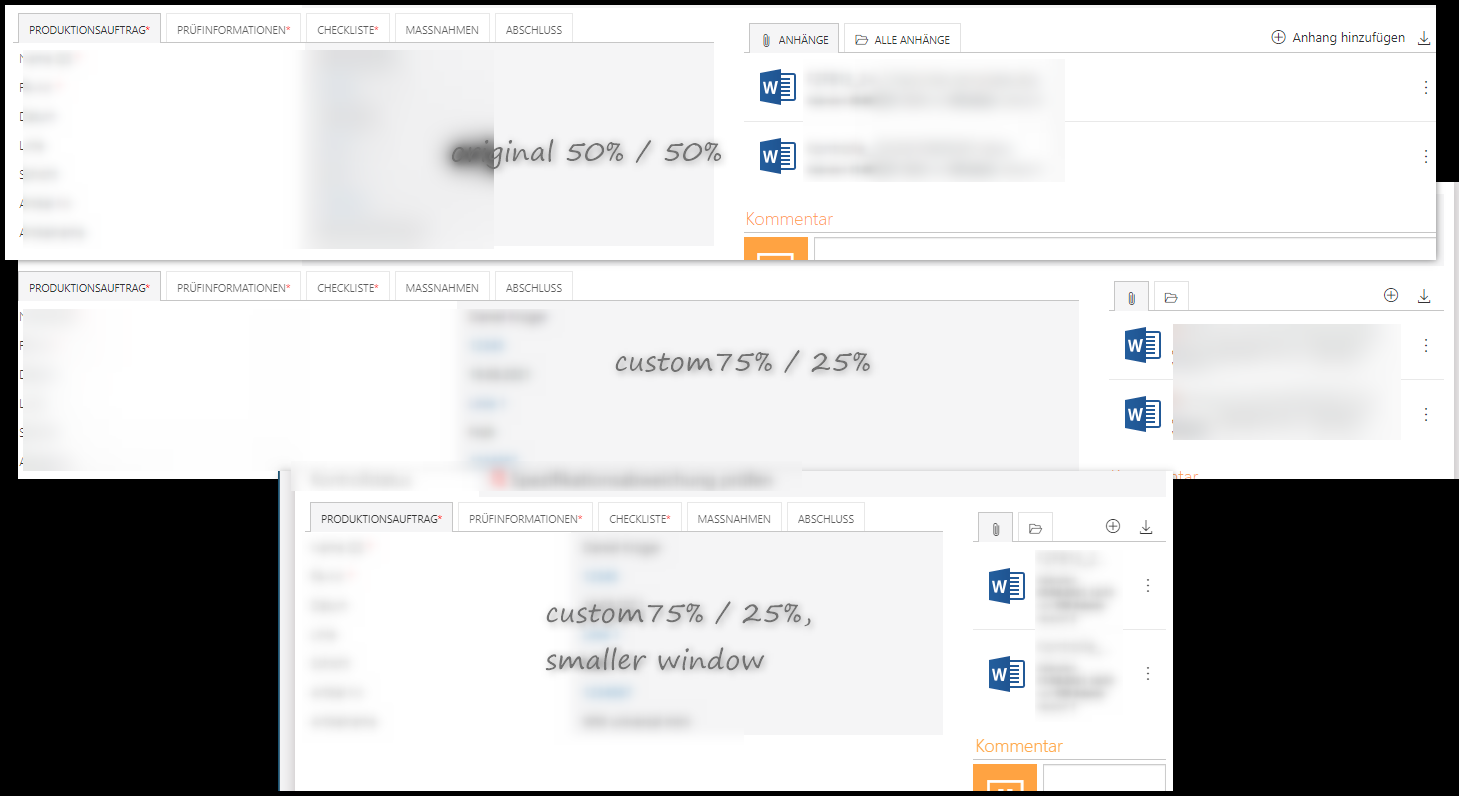
- Form: Changing left/right layout from 50%/50% -> 75%/25%
- Hiding the Attachments Form Field programmatically like other fields
This post will explain the basic approach in more detail and list a few samples.
Options for reacting on dynamically created elements
Reacting on created/removed elements
JavaScript provides an option to watch for any newly created or removed elements. This option is called MutationObserver. You could use this if your form contains multiple tabs. Clicking on one tab will hide the current tab elements and display the other ones. Actually they aren’t hidden and displayed but removed from and added to the DOM. Using the MutationObserver you can can check whether the element is displayed and act accordingly.
I have used this in a PoC modifying an item list which was inside a tab. The below code lists the stub for reacting on newly displayed elements, which may also contain the wanted item lists.
ccls = window.ccls || {};
ccls.itemListDialogExtension = ccls.itemListDialogExtension  || {};
ccls.itemListDialogExtension.itemListIds = ["SubElems_#{WFCON:2506}#"];
// Define the observer once
ccls.itemListExtension.Observer = new MutationObserver(function(mutations_list) {
	ccls.itemListExtension.modification();
});

ccls.itemListExtension.modification = function (){
  // Disconnecting the observer in case the forEach loop will create elements too
	ccls.itemListExtension.Observer.disconnect();
	ccls.itemListExtension.itemListIds.forEach(itemListId =>
		{
			// Get item list and do something
			var itemList = $('#'+itemListId);
		}
	);
  // Reconnect the observer
	ccls.itemListExtension.watchDOMChanges();
}

ccls.itemListExtension.watchDOMChanges = function (){
  // Try to define query which is as limited as possible.
	ccls.itemListExtension.Observer.observe(document.querySelector("#main-form-page"), { subtree: true, childList: true });
}

// Attach the observer for the first time
ccls.itemListDialogExtension.watchDOMChanges();
Remark: If you are going to use this approach, you should be aware, that this will have an impact on the client performance wise, especially in large forms. You should carefully test it, and try to observe as little as possible. If possible make use of the mutations_list parameter and read up on the MutationObserver in general.
Testing whether an element exists yet
If an element is dynamically generated after page load, you could check this periodically using the setTimeout function. If the element doesn’t exist, you can use setTimeout to test again after some time.
I use the below stub. I only need to change functionName, the element IDENTIFIER and implement the logic itself. The ccls will (very likely) prevent any collisions with other JavaScript variables. The functionName will prevent collisions whenever multiple timeout checks are executed/loaded on page load.
// If ccls exist assign it to ccls, if it doesn't (||) existCreate an new object (namespace)
ccls = ccls || {};
// create a new object for our function
ccls.functionName = {};
// Set base timeout settings
ccls.functionName.Timeout = 0;
ccls.functionName.TimeoutMax  = 4;

ccls.functionName.execute = function (){
    // Start debugger, if debug parameter is set via query parameter.
    if (new URLSearchParams(document.location.search).get("debug") == 1) {
        debugger;
    }
	  ccls.functionName.Timeout++;

    // verify that the attachment element exists
    var items = document.getElementsByClassName(".IDENTIFIER");
    if (items == null || items.length != 1 ){
        // as long as we didn't reach the maximum number of timeout calls, create another one.
        if (ccls.functionName.Timeout<= ccls.functionName.TimeoutMax){
          // the execute function will be executed again in 333ms
			    setTimeout(function (){ccls.functionName.execute();},333)
        }
        return;
    }

	  // item exists, implement the required action
    items[0].click();
}

ccls.functionName.execute();
Info: This is my preferred approach. The code is fast to execute and it’s executed a limited number of times. Therefore, the impact on the client should be minimal.
Drawback: This won’t work well if you have tabs on your form. My example stops after a number of tries, to limit the impact. This isn’t an option if you want to react on the elements added by clicking on a different tab. You could remove the limit of course, but in this case you should make a performance comparison to verify if the MutationObserveror the setTimeout approach is better.
Execution on page load
Common to each approach is the way how you can execute them.
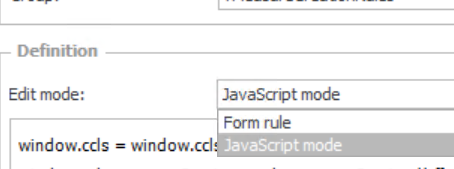
- Create a form rule with edit mode
JavaScript mode - Add the form rule to the
Behaviortab

Samples
Show hide Attachments element based on a field
If you want to display the attachment sections depending on some condition, you can use the following script as an example. I’ve copied my example from this question. The attachment section should only be displayed if a field is ticked.
window.ccls = window.ccls || {};
ccls.showHideAttachments = {};
ccls.showHideAttachments.Timeout = 0;
ccls.showHideAttachments.TimeoutMax = 4;

ccls.showHideAttachments .execute = function (){
  // Start debugger, if debug parameter is set and dev tools are started.
  if (new URLSearchParams(document.location.search).get("debug") == 1) {
    debugger;
  }
  ccls.showHideAttachments.Timeout++;
  var items = $("[data-type='SystemAttachments']");
  // verify that element exists
  if (items == null || items.length == 0 ){
    if (ccls.showHideAttachments.Timeout<= ccls.showHideAttachments.TimeoutMax){
      setTimeout(function (){ccls.showHideAttachments.execute();},333)
    }
    return;
  }

  // element is available, specific logic is executed
  if (GetValue('#{FLD:595}#') == 1)
  {
    $("[data-type='SystemAttachments']").show();
  } else {
    $("[data-type='SystemAttachments']").hide();
  }
}

ccls.showHideAttachments.execute();
Remark: The above script focuses only on displaying the attachment element on page load. You need an additional script to react on value change of the field.
Changing left/right layout from 50%/50% -> 75%/25%
Remark: This is an old approach and is replaced by an easier and more flexible.
The following script changes the default form layout width distribution from 50% for each to 75% for right and 25 % for the left column. This is also described here

.
window.ccls = window.ccls || {};
ccls.changePanelWidth = {};
ccls.changePanelWidth.Timeout = 0;
ccls.changePanelWidth.TimeoutMax = 4;

ccls.changePanelWidth.execute = function (pathId,alternativeLabel){
  var items = document.getElementById("RightPanelOuter");
  // verify that the element exists.
  if (items == null ){
    if (ccls.changePanelWidth.Timeout <= ccls.changePanelWidth.TimeoutMax){
      ccls.changePanelWidth.Timeout ++;
      setTimeout(function (){ccls.changePanelWidth.execute();},50)
    }
    return;
  }
  var elem = document.getElementById("RightPanelOuter");
  elem.classList.replace("col-md-6","col-md-3")
  elem = document.getElementById("LeftPanel");
  elem.classList.replace("col-md-6","col-md-9")
}

ccls.changePanelWidth.execute();
Show all attachments after page load
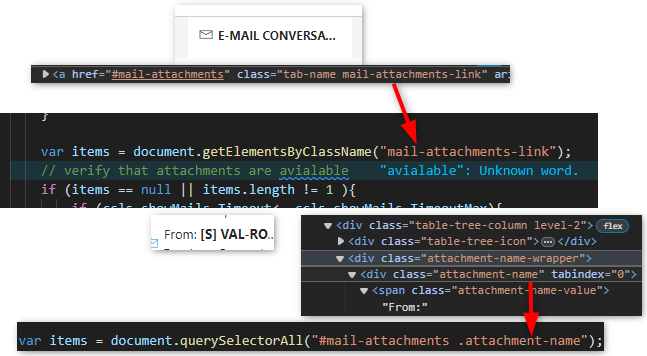
If you want to display the All Attachments tab on page load, you can use the following script. In case you want to display the email conversation tab you can simply replace all-attachments-link with mail-attachments-link.

window.ccls = window.ccls || {};
ccls.showAllAttachments = {};
ccls.showAllAttachments.Timeout = 0;
ccls.showAllAttachments.TimeoutMax  = 4;

ccls.showAllAttachments.execute = function (){
    // Start debugger, if debug parameter is set and dev tools are started.
    if (new URLSearchParams(document.location.search).get("debug") == 1) {
        debugger;
    }

    var items = document.getElementsByClassName("all-attachments-link");
    // verify that attachments are avialable
    if (items == null || items.length != 1 ){
        if (ccls.showAllAttachments.Timeout<= ccls.showAllAttachments.TimeoutMax){
            ccls.showAllAttachments.Timeout ++;
            setTimeout(function (){ccls.showAllAttachments.execute();},333)
        }
        return;
    }
    items[0].click();
}

ccls.showAllAttachments.execute();
Show mail attachments and display first after page load
Remark: This was added in 2024 using WEBCON BPS 2023.1.3.118. In case there have been any changes in the DOM this won’t work in an earlier version.
The provided JS first clicks first on the mail attachments tab. Afterwards it checks a few times whether a mail exists. In case it doesn’t work, you should first check whether the classes are still valid.

window.ccls = window.dkr || {};
ccls.showMails = {};
ccls.showMails.Timeout = 0;
ccls.showMails.TimeoutMax  = 4;
ccls.showFirstAttachment= {};
ccls.showFirstAttachment.Timeout = 0;
ccls.showFirstAttachment.TimeoutMax  = 10;

ccls.showMails.execute = function (){
    // Start debugger, if debug parameter is set and dev tools are started.
    if (new URLSearchParams(document.location.search).get("debug") == 1) {
        debugger;
    }

    var items = document.getElementsByClassName("mail-attachments-link");
    // verify that attachments are avialable
    if (items == null || items.length != 1 ){
        if (ccls.showMails.Timeout<= ccls.showMails.TimeoutMax){
            ccls.showMails.Timeout ++;
            setTimeout(function (){ccls.showMails.execute();},333)
        }
        return;
    }
    items[0].click();
	ccls.showFirstAttachment.execute();
}


ccls.showFirstAttachment.execute = function (){
    // Start debugger, if debug parameter is set and dev tools are started.
    if (new URLSearchParams(document.location.search).get("debug") == 1) {
        debugger;
    }

	var items = document.querySelectorAll("#mail-attachments .attachment-name");
    if (items == null || items.length != 1 ){
        if (ccls.showFirstAttachment.Timeout<= ccls.showFirstAttachment.TimeoutMax){
            ccls.showFirstAttachment.Timeout ++;
            setTimeout(function (){ccls.showFirstAttachment.execute();},333)
        }
        return;
    }
	var mousedownEvent = new MouseEvent('mousedown', { bubbles: true });
	items[0].dispatchEvent(mousedownEvent);
}

ccls.showMails.execute();
console.log("Show mails and display first one loaded");
Adding a save draft button in the toolbar
This is described here.
Duplicating the save menu button as a path button
This is described here.
Comments