Copy an attachment to another workflow
Info: In WEBCON BPS 2025 a dedicated action has been created for this.
Overview
The default actions of WEBCON BPS allow us to:
- Create attachment for the current workflow instance.
- Copy attachments from another workflow to the current instance.
If you want to copy an attachment from the current instance to another you have three options:
- Trigger a path transition in the target workflow, so that it can use the standard action to copy the attachment from the other instance to its own instance.
- Write an SDK plugin to do so.
- Use the REST API.
This post covers the necessary actions for the REST API option.
Setup
Prepare the API application
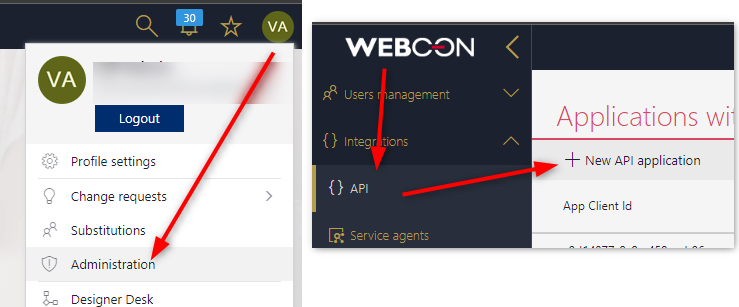
If you don’t have an existing API create a new one at:
https://WEBCONBPSSERVER/adminpanel/apiApplications
Generate a secret and store it in KeePass or similar. We will need it later. Finally grant at least App.Elements.ReadWrite.All permissions.
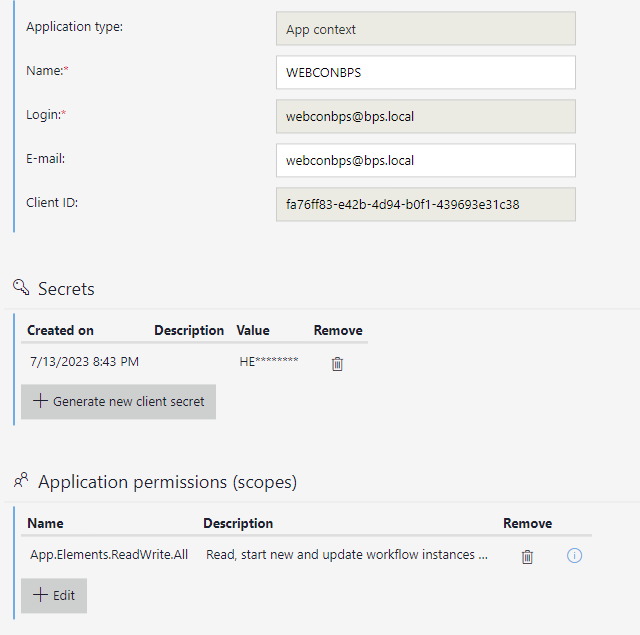
You can find a more detailed description at WEBCON Developer portal.
The permissions have the following information: Information about the permission App.Elements.ReadWrite.All: Read, start new and update workflow instances in all processes (form fields, attachments and metadata). Additional read, update or start new permissions on each instance are required.
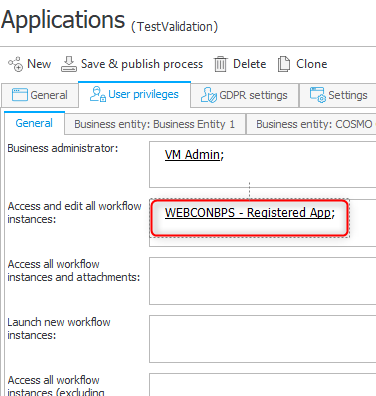
Therefore, we need to grant the application at least permissions on the process level.
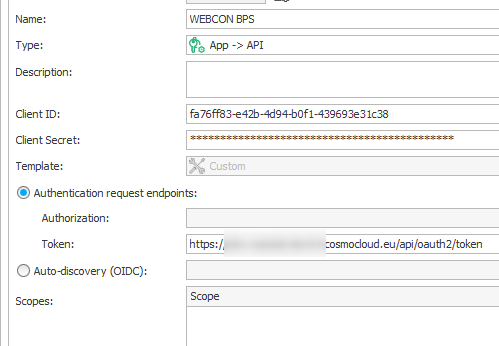
Setup the connection
Add an OAuth2 APP -> API authentication using the client id and generated secret of the created application. Use your server in the token URL:
https://WEBCONBPSSERVER/api/oauth2/token
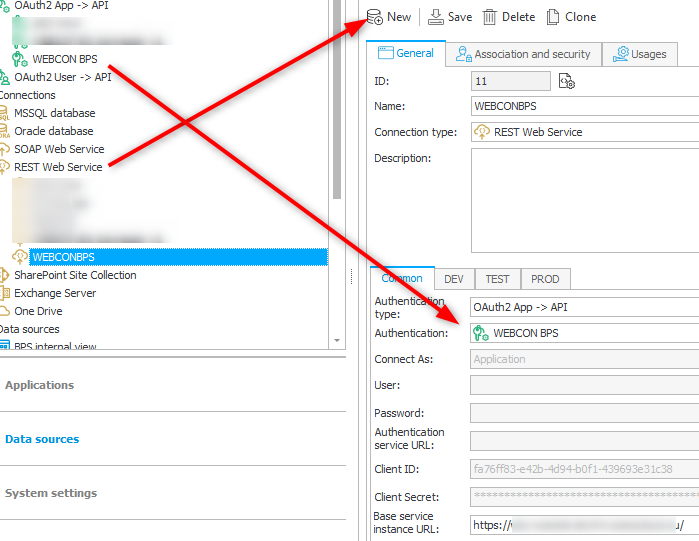
Create a new REST Web Service connection using authentication type OAtuh2 App -> API with the newly created authentication option. Use the BPS portal URL as a base service instance URL:
https://WEBCONBPSSERVER
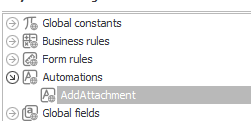
Create the automation
Overview
If you are already using WEBCON BPS 2023 you should make use of the new global automations. :)
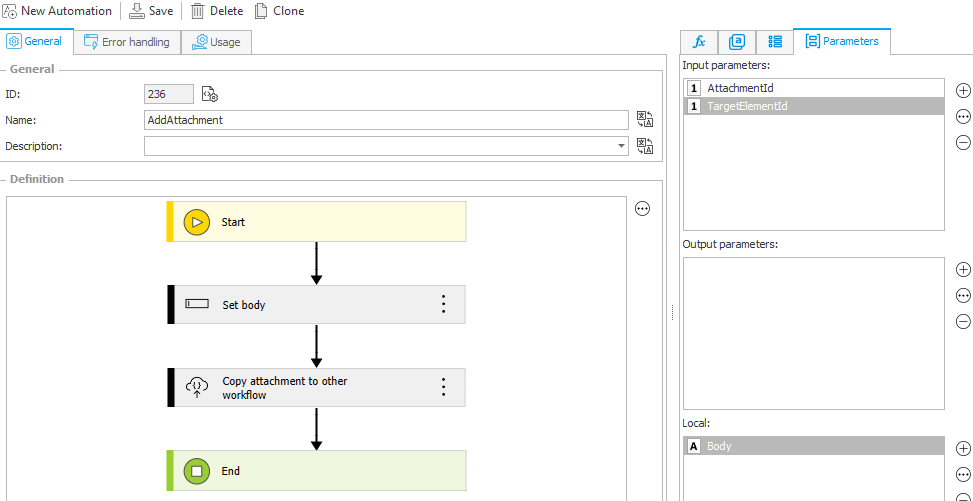
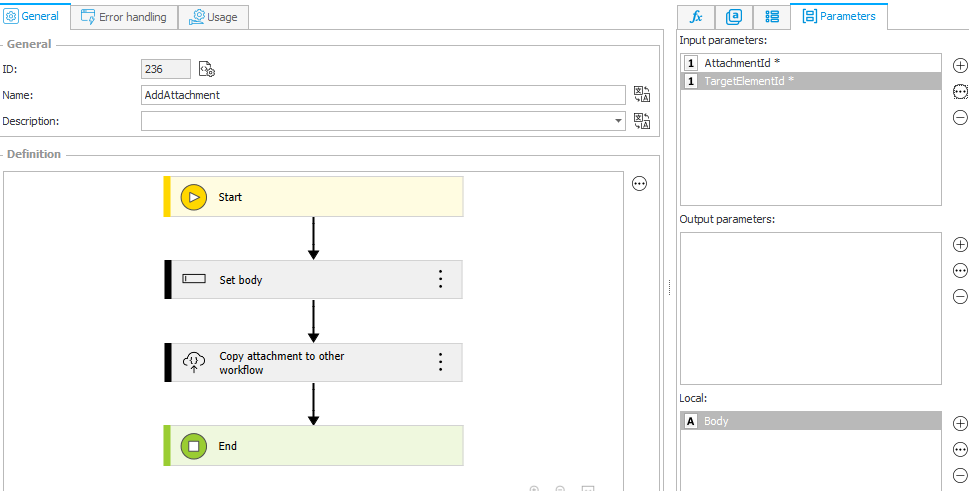
The automation will consist of:
- 2 input parameters
- AttachmentId, which should be copied.
- TargetElementId, the instance id to which the attachment should be copied.
- 1 local parameter
- Body, the content we need to pass to the API endpoint.
- 2 actions
- Change value of a single field for creating the body.
- Invoke REST Web service to execute the request.
Generate the body
The API endpoint for adding an attachment is
/api/data/v4.0/db/{dbid}/elements/{id}/attachments
It requires this body
{
  "name": "string",
  "description": "string",
  "group": "string",
  "content": "string"
}
Info:
You can find more information about the API endpoint at (https://WEBCONBPSSERVER/api/index.html?urls.primaryName=API%20v4.0) under PublicApiElements. Look for a green post action which ends with attachments
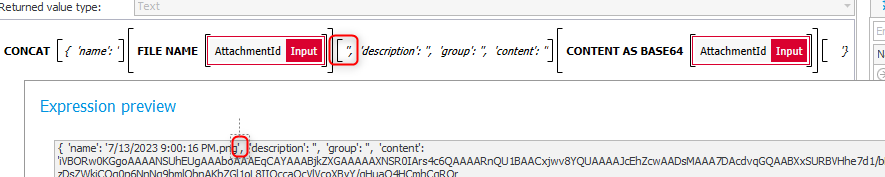
The easiest way I found to generate the body is using the Change value of single field action with a Concat function.
I’ve used text in combination with the functions FILE NAME and CONTENT AS BASE64.

These are the text values I used.
{  'name': '
'',  'description': '',  'group': '',  'content': ''
'}
I have no idea why, but for some reason I had to add an extra ' at one place, so make sure, that every property name on the left is enclosed with single quotes as well as the value on the right in your environment.
Info:
Please take a look at Pawełs comment. For some reason the place where we need to add two ' changes depending on the number of variables.
Define the Inokve REST Web service action
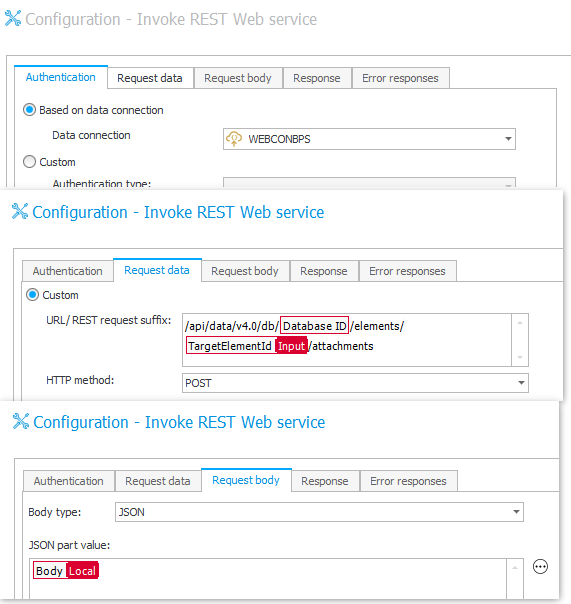
Setting up the Invoke REST Web service action is quite simple.
- Make use of the created
REST Web service connection. - Define the URL/REST request suffix
/api/data/v4.0/db/#{DBID}#/elements/#{AUTP_Value:24}#/attachmentsThis is assuming, that you want to copy the attachment to an instance in the current database. If you need to copy it to another database, you would need to change the value of the database ID variable.
- Use the local
Bodyparameter in theRequest bodytab
If you need to do something with the response, you can copy the response body from the API definition. Alternatively, you can use this one, which is valid for version 3 -5.
{
  "id": 0,
  "name": "string",
  "version": 0
}

Remark: The API version depends on your environment. API 4.0 has been available with the release of WEBCON BPS 2022. Therefore, you should check which versions are supported by your environment and use the latest one. API 3.0 has been deprecated with BPS 2023 and 2.0 is no longer available.
Remark:
The API also has a forceCheckout query parameter. Without this parameter the call may fail if a user checked out the element. If you want to use it, you need to modify the URL and grant Admin privileges to the created application and admin permissions on process level.
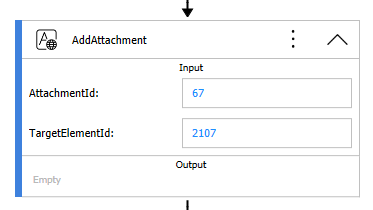
Using the automation
If you are lucky and are already running BPS 2023, you have now an easy to use option which can be utilized in any process. Simply pass the ID of the attachment which should be copied and the ID of the target element.
This will add the attachment to the element without creating a new version. In my case I modified my approach and manually removed the copied attachment.
Comments