Custom template for generated process documentation
Overview
WEBCON BPS allows to create a documentation for a process. The created documentation contains general descriptions about BPS Portal, and how to use it as well as information about the selected process. These are high level information about the process like workflows, fields, diagram as well as detailed information about the actions which are executed on path transition.
Info: More information can be found in this knowledge base post Generating documentation.
While the result of the predefined template can be fine, you may want to create the documentation using your corporate design. In our case the header contains the process name as well as the current chapter. In addition, our styles are for the headings (3) as well as for the table (4) are used.

Depending on your situation it may be easier to change the provided template or to modify the template from you company. This post covers the later one.
Location of the templates
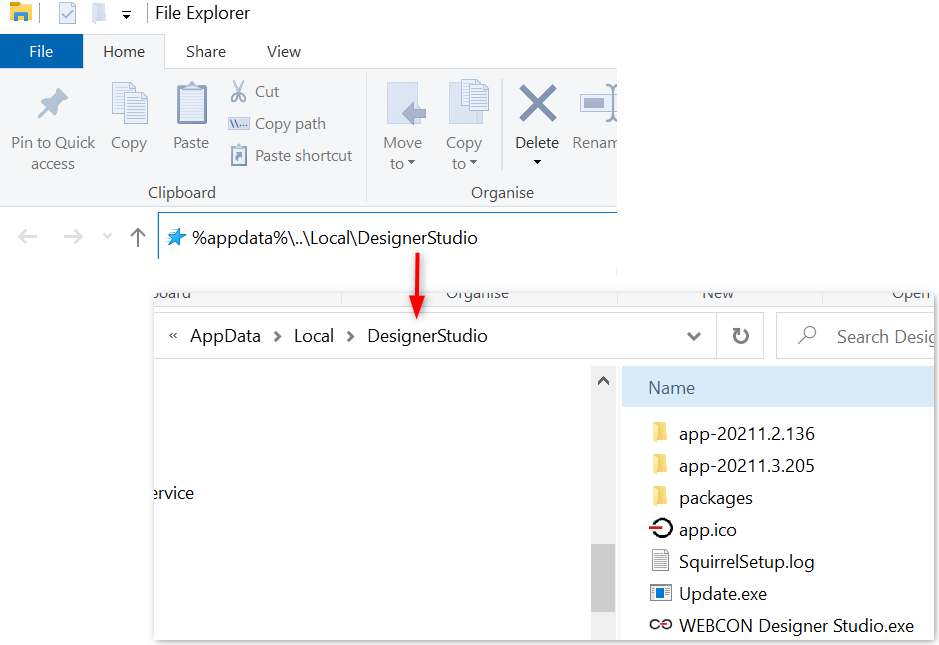
The templates for creating the process documentation are stored within the Designer Studio installation folder. While the Designer Studio installed from the BPS Portal resides in the AppData folder of the current folder the other one is stored in the Program Files (x86) folder:
- BPS Portal installation version
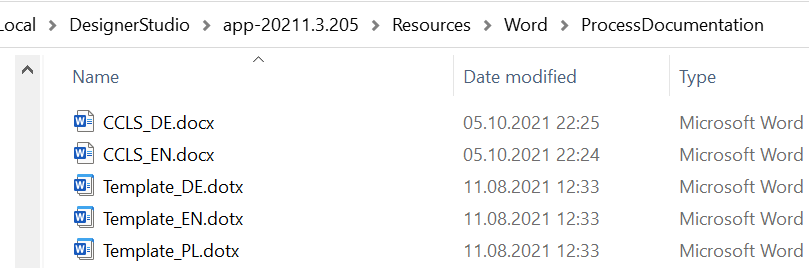
For each new version an own Designer Studio is installed in the following path%appdata%\..\Local\DesignerStudioOnce you have selected the correct version you can navigate to\Resources\Word\ProcessDocumentation - Setup.exe installed version
If you used the default installation folder, the templates can be found in the following path.%ProgramFiles(x86)%\WEBCON\WEBCON BPS Designer Studio\Resources\Word\ProcessDocumentation
You can copy the provided paths to the explorer so that you can easily navigate to the process generation templates.
Copying default information
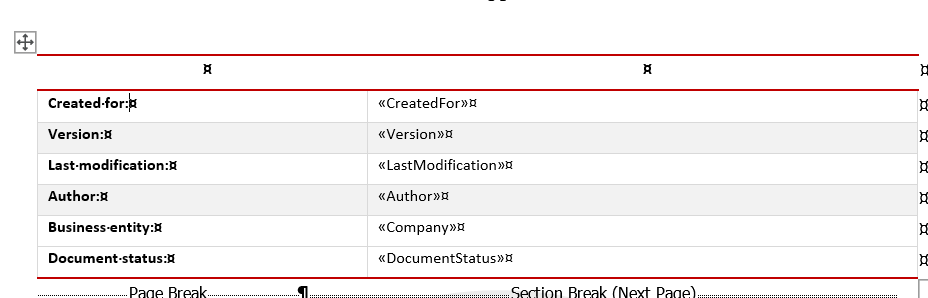
After opening an existing template, you will notice that it contains the default documentation (1) as well as placeholders (2). The content of the whole document will be part of each generated documentation. while the placeholder will be replaced by their real value.

If the generic information should be part of your documentation, or you want to add something else you can simply copy it to your template. The generated content will be placed afterwards.
Let’s have a look at the placeholders. If you press Alt+F9, the friendly placeholder names you will be replaced by their hidden field definition.
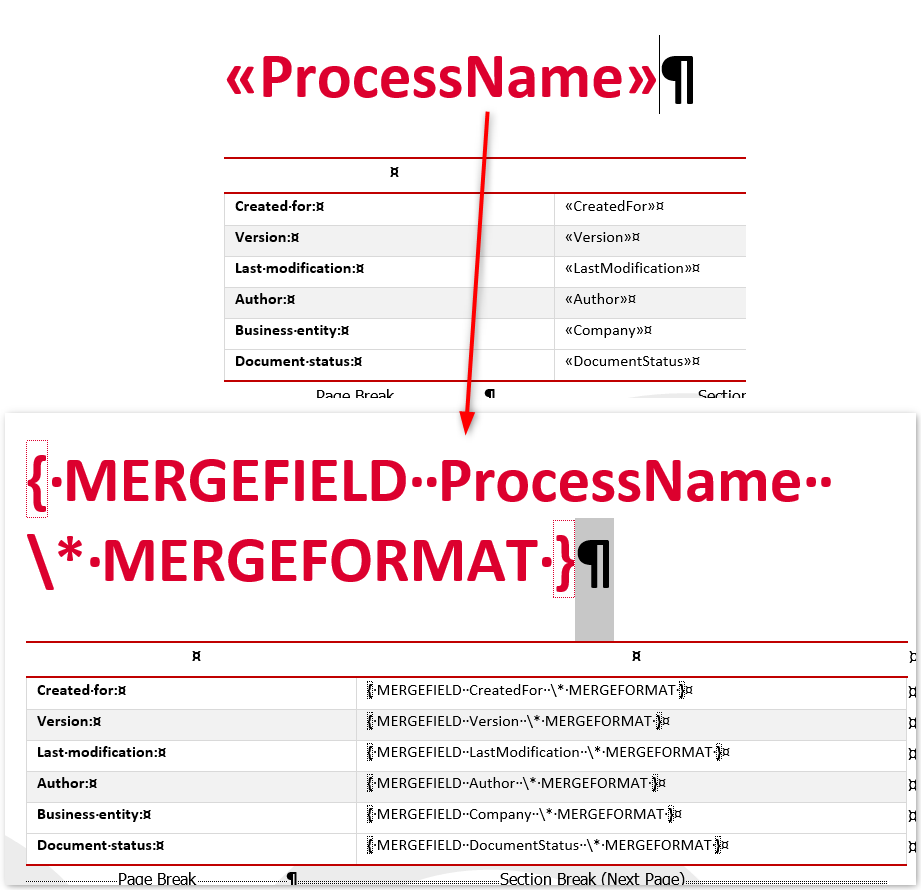
<<ProcessName>> hides a field.
If you want to copy a specific placeholder to your own template, you can either create the field or copy the whole field. Just make sure to select the correct formatting option during pasting.
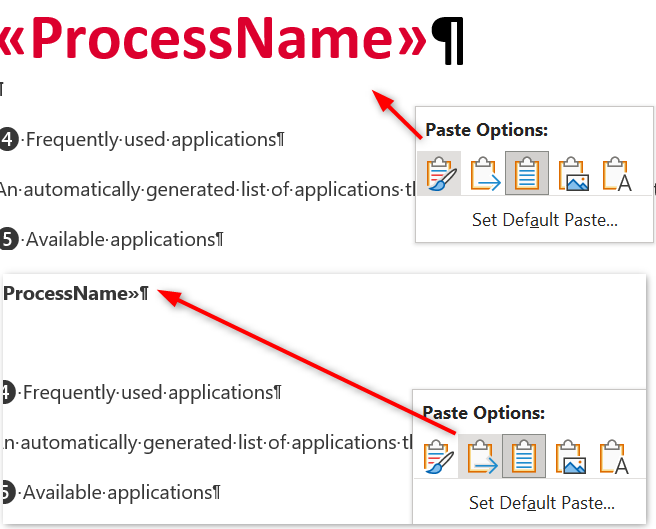
That’s all. You don’t need to create the referenced field ProcessName.
Updating the table design
The table design we see on the first page of the default template will be applied to each generated table.
My first approach was to copy the table, so that the design is copied as well. This worked but I didn’t like it. So I went on to find an even simpler approach and I found it. You can simply rename one of your table designs to WebconTable. Just right click the design, select Modify Table Style (1), and copy the name (2). That’s all.
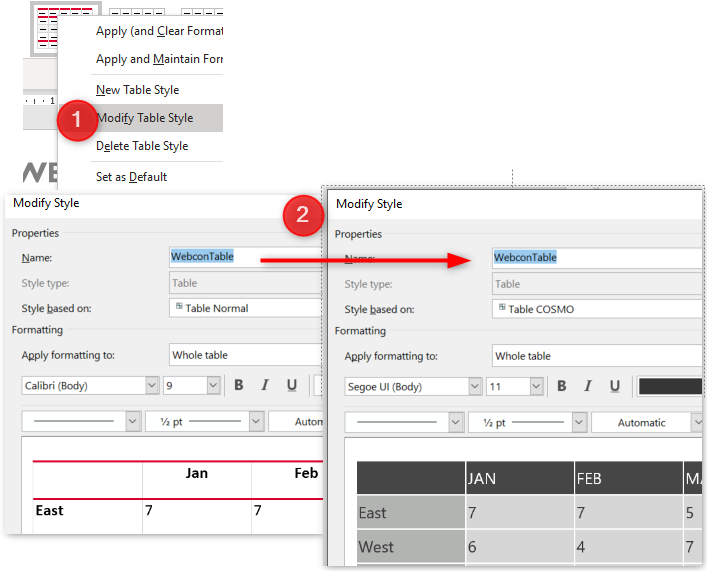
WebconTable is applied to each generated table.
Necessary Headings
The generated content will use at least headings 1-4 or even heading 5. This depends on the paths and defined actions.
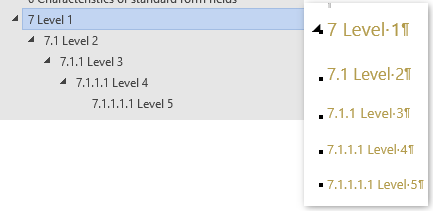
If a heading is not displayed in the Styles area, you can easily display it by creating a heading of this level in the document. This is achieved by applying a displayed heading to a text and demoting it via the navigation pane.
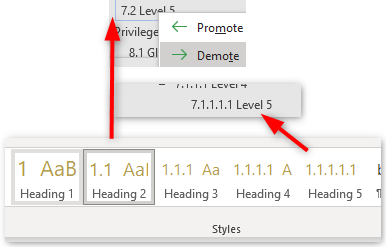
Heading 5 will be displayed.
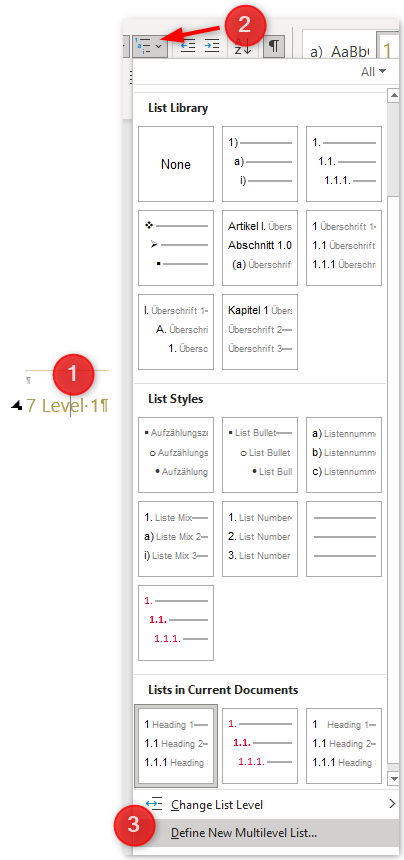
Apply numbering to a heading
If you prefer to apply numbering to your headings, you can use the following way. Place the cursor on a Heading element, and open the drop down from the Multilevel List icon (2), and select Define New Multilevel List .
The opened dialog will allow you the format of the number. After selecting a level (1), make sure it matches the appropriate Heading x style. Afterwards you can choose which of the previous level numbers you want to include in your number (3). Finally, you can select the number style for this level (4). You could even choose to use a different style for this level (5).
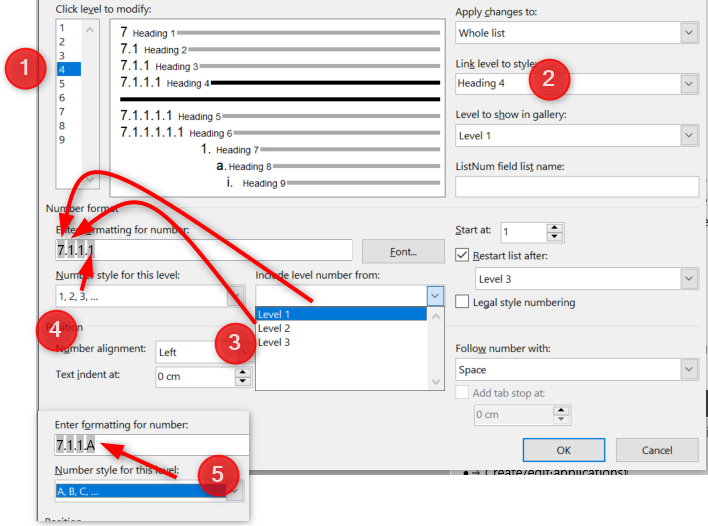
Remark: The number style format needs to be applied for each level separately.
Styling the table of content
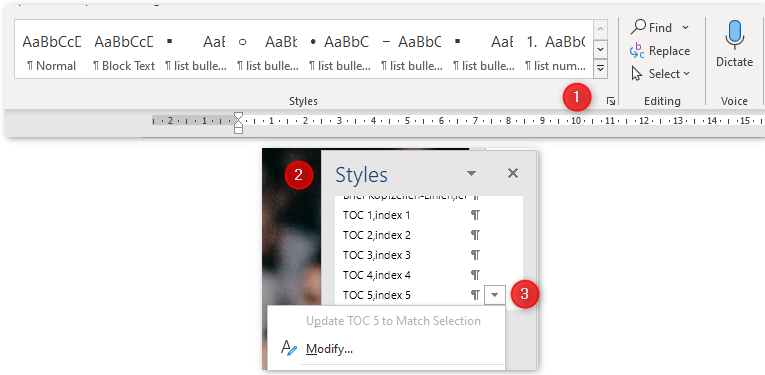
We already learned, that we need to style the headings one to five. If we want to display all headings in the table of content, we need to make sure that we style these also. If you click on the little arrow (1) in the Styles group the Styles dialog (2) will be displayed. This dialog, lists all available styles. Within all these styles you need to locate the TOC styles and modify them (3) so that the table of content looks good.
Stylesdialog.
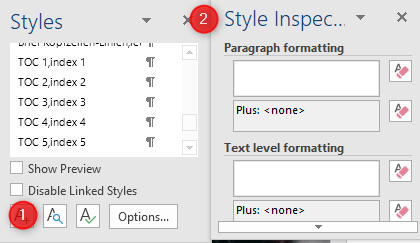
If you want to verify which styles something uses, the click on middle icon (1) of the Styles dialog, the Style Inspector will be displayed.
Style Inspectorcan be opened from the Styles dialog.
Info: The Styles dialog can be used an alternative way for defining the heading styles.
The Style Inspector displays the style which is applied to the paragraph in which the cursor is currently located. You can use this to verify which style is used for the current ToC entry.
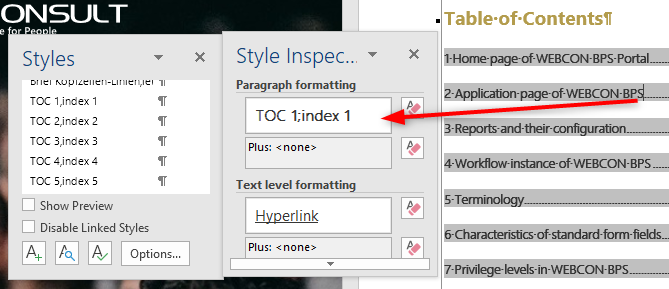
TOC 1;index 1 style.
Remarks
The following applies at least to version 2021.1.3.205.
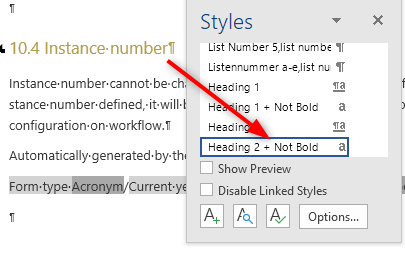
In some cases, a bold/not bold style is applied to heading. There’s nothing that you can do about it. You can verify that you’ve defined the heading correctly by displaying the Styles dialog. If you place your cursor inside the heading, the current style will be displayed. In some cases Not Bold will be applied to the heading style and in others Bold.
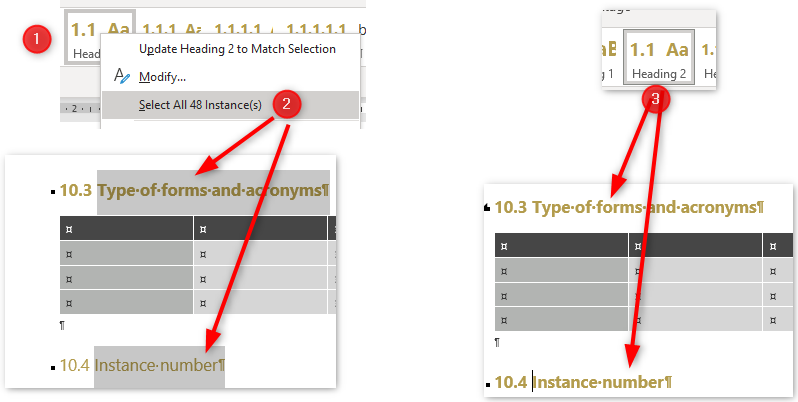
This can easily be fixed in the generated documentation. Right click (1) on the style and choose Select all (2). This will mark all headings. Afterwards left click the heading again (3). This will apply the style to all selected elements.
Comments