Debug a web service data source alternative
Overview
This post is intended if you need to debug web service data source in these use cases:
- You don’t have admin permissions.
- WEBCON BPS is run in the public cloud WEBCONAPPS http://customer.webconapps.com.
- You don’t have access to the WEBCON BPS server the server and it cannot connect to your computer.
In all other cases it would be easier to follow this post Debug a web service data source.
Preparation
Prerequisites
For the described use cases we have the following prerequisites
- ngrok, will make your local computer accessible from the internet.
- nginx, will forward the request from your computer to the actual target.
Configuration of ngrok
There’s not much to do here. Follow Steps 2 to 3 from getting started page. Basically, it tells you to download ngrok, sign up, and get an authentication token for your newly created account on your computer. Afterwards you can use the following command.
ngrok http http://localhost:8000 --scheme http
This will start a tunnel from the ngrok server to your computer via the http://*.io address and you can view the incoming requests using the web interface.
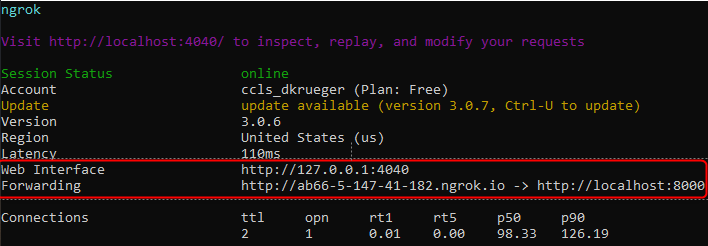
Remark: If you are using a free account, the forwarding URL will change every time.
Configuration of nginx
Like ngrok, nginx needs to be extracted and can be started from the command line. Before starting it, we need to change the configuration. This is done by modifying the nginx\conf\nginxc.con file and adding a server element:
	server {
		listen       localhost:8000;
		location / {
			proxy_pass https://actualserver.com:7348/;
		}
	}
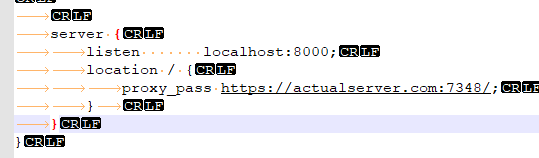
You need to change proxy_pass to be the same as the REST web service URL. listen should match the URL with which ngrok has been started.
Afterwards you can start nginx.exe with a double click or the command line.
Info: You can test the configuration with calling nginx -t in the command line. This will show you if there are any configuration errors. This is helpful because executing nginx will start background processes which are only visible in the task manager. If the configuration is wrong, it will fail silently.
Complete config file
#user  nobody;
worker_processes  1;
error_log  logs/error.log;
error_log  logs/error.log  notice;
error_log  logs/error.log  info;
#pid        logs/nginx.pid;
events {
    worker_connections  1024;
}
http {
    include       mime.types;
    default_type  application/octet-stream;

    log_format  main  '$remote_addr - $remote_user [$time_local] "$request" '
    #                  '$status $body_bytes_sent "$http_referer" '
    #                  '"$http_user_agent" "$http_x_forwarded_for"';
    access_log  logs/access.log  main;
    sendfile        on;
    keepalive_timeout  65;
server {
		listen       localhost:8000;
		server_name         localhost;
		location / {
			proxy_pass https://....:7348/;
		}
	}
}
Configuration of WEBCON BPS
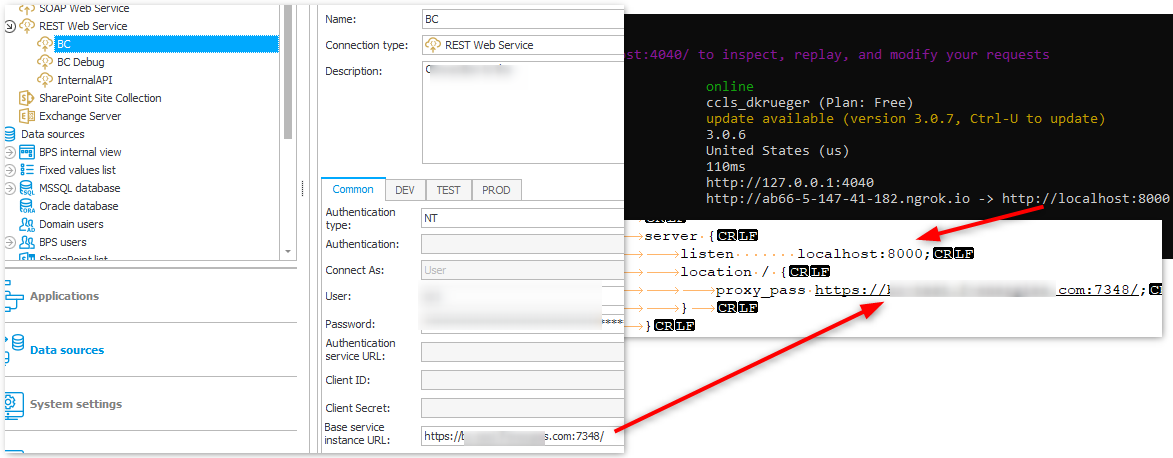
After configuring ngrok and nginx the only missing part is configuring WEBCON BPS. I found it helpful to duplicate the connection and change the Base service instance URL for this to the forwarding URL generated by ngrok.
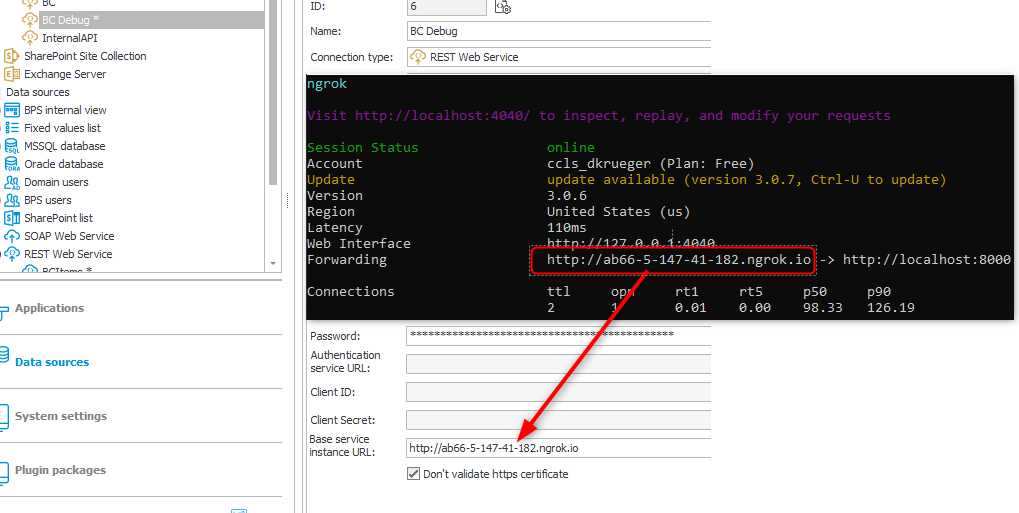
Base web service URL
Afterwards you can change the connection in the data source and start testing.
Testing
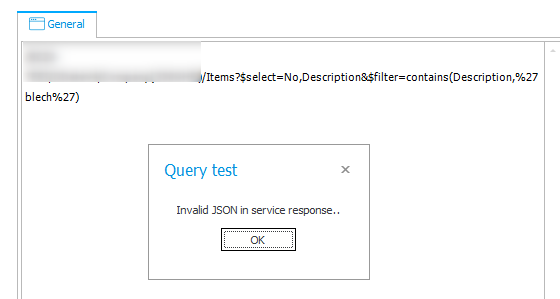
In my case the request failed with Invalid JSON in service response. after changing the connection.
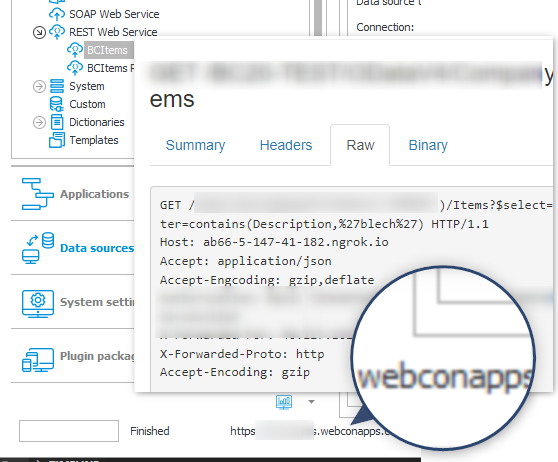
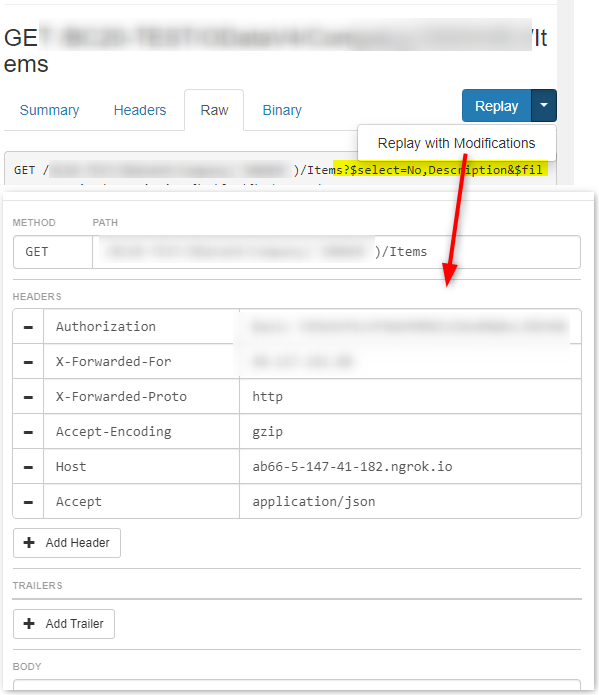
The request was visible from the ngrok web interface (1) and there it was a “Bad Gateway” error.
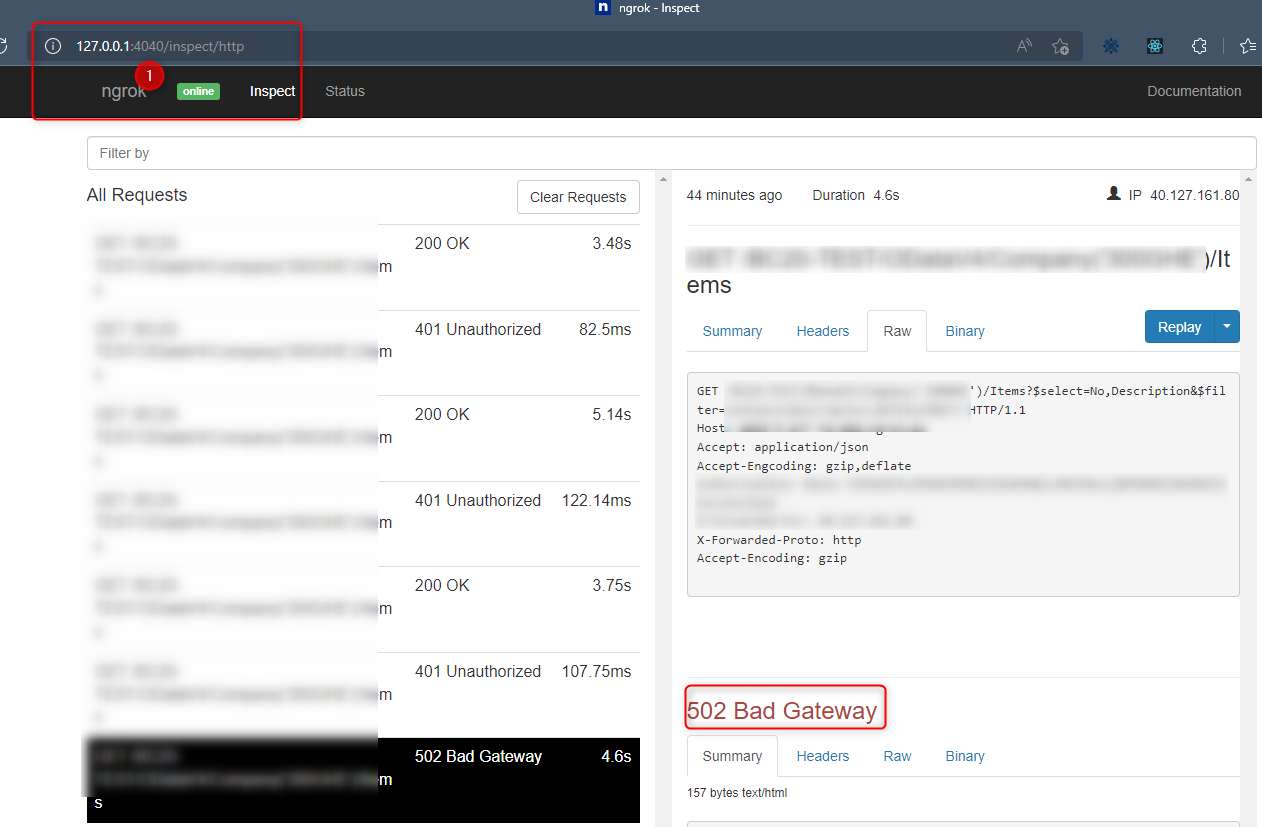
Afterwards I tried to call the same URL from a browser which worked fine, so there was a difference in the request which caused the problem and it’s start for trial & error to see which difference caused the problem.
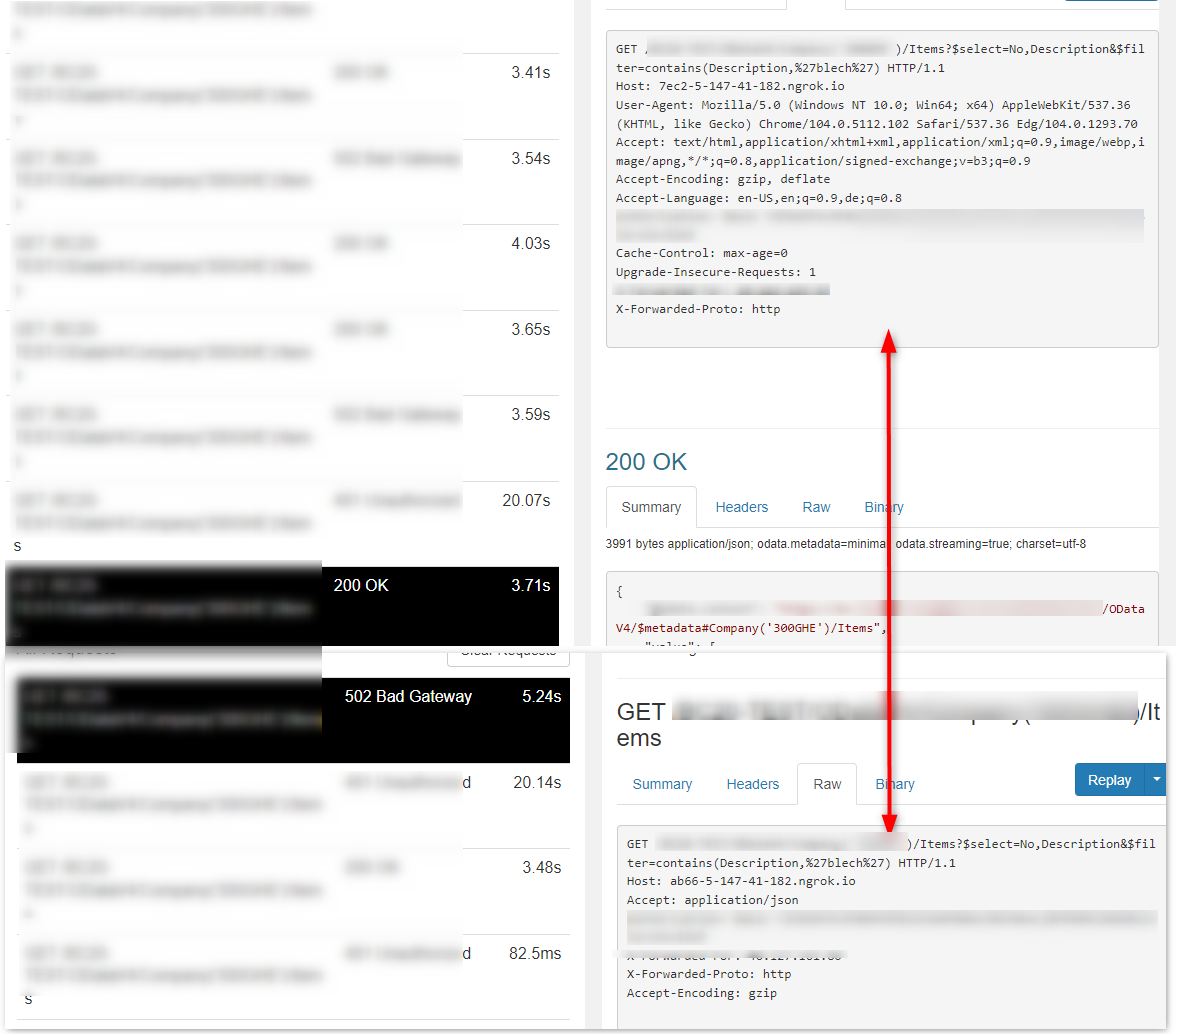
Don’t fear you can use the Replay with Modifications option from the Replay menu for this. You can manually modify the request and test it again.
In my case (Business Central) I had to add the custom header:
Accept-Encoding: gzip, deflate
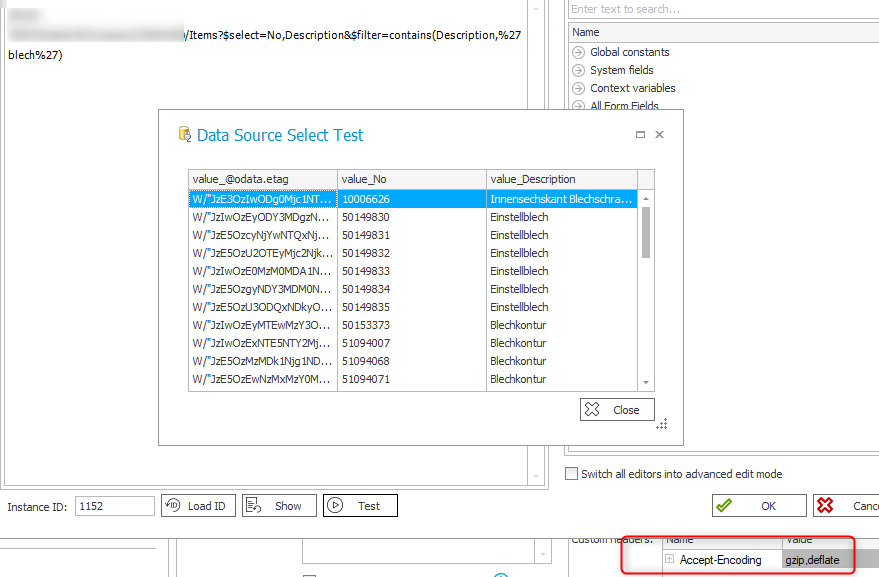
Invalid JSON in service response error for Business Central
Once you verified the base functionality, you can continue with your actual issue.
Info: Replaying a request will not copy the query parameters. If you need these, you need to add them manually every time.
Cleaning up
Once you are finished you need to restore the connection of the modified data source and stop ngrok and nginx. In my case I had to resort to force to kill nginx from the task manager.
I prefer automating things, especially if I don’t use them on a regular basis. Therefore, I created two batch files. Which I placed in the same folder where I saved nginx and ngrok.
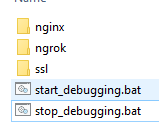
Content of start_debugging.bat
cd nginx
start nginx.exe
cd ..\ngrok
start .\ngrok.exe http http://localhost:8000 --scheme http
Content of stop_debugging.bat
taskkill /f /im nginx.exe
taskkill /im ngrok.exe
Plain text warning
WEBCON BPS will communicate in plain text with your computer. You may be able to change this configuring ngrok and nginx to use https. Activating https for ngrok is simple:
ngrok http https://localhost:443 --scheme https
For nginx you need to configure the server to use SSL, provide a certificate and key.
I generated a self-signed certificate since you can deactivate certificate validation in the Designer Studio of the connection.
The following commands generate a self signed certificate and exports it to a file which should contain the private key secured with the defined password. The execution requires admin privileges.
$targetFolder = "C:\Workspace\PoC\Inspect_WEBCONAPPS_Calls\"
$pfxFilePath = "$targetFolder\localhost.pfx"
$plainTextPassword = "Temp123"
$password = ConvertTo-SecureString -AsPlainText $plainTextPassword -Force
$cert = New-SelfSignedCertificate -DnsName @("localhost", "localhost.com")  -CertStoreLocation "cert:\LocalMachine\My" -NotAfter '2025-12-31'
Export-PfxCertificate -Cert $cert -FilePath $pfxFilePath -Password $password   -Verbose | Out-Null
Extracting the private key from it with PowerShell didn’t work for me. I tested different, options but nothing was successful. So, I switched to this option (http://www.markbrilman.nl/2011/08/howto-convert-a-pfx-to-a-seperate-key-crt-file/), downloaded openssl to generate the certificate and key file. The last line of this code removes the pass phrase so nginx doesn’t ask for it during the start.
.\openssl\openssl pkcs12 -in localhost.pfx -nocerts -out localhost.key
.\openssl\openssl pkcs12 -in localhost.pfx -clcerts -nokeys -out localhost.crt
.\openssl\openssl rsa -in localhost.key -out localhost.unsecured.key
I copied these to the created folder nginx\conf\ssl and modified the config to:
	server {
		listen       localhost:8000;
		listen              443 ssl; # 'ssl' parameter tells NGINX to decrypt the traffic
		server_name         www.dummy.com;
		ssl_certificate     ssl/dummycertificate.crt; # The certificate file
		ssl_certificate_key ssl/dummycertificate.unsecured.key; # The private key file

		location / {
			proxy_pass https://actualserver.com:7348/;
		}
	}
Testing the configuration works fine from the browser but from WEBCON BPS the connection can not be established. The reason for this is that WEBCON BPS executes a CONNECT method:
According to this post:
This doesn't work at all, because nginx is not designed to be a forward proxy, and does not support the CONNECT method.
https://serverfault.com/questions/952073/nginx-reverse-proxy-getting-http-connect-commands
There’s a module which could solve this, but you would need to build your own nginx version.
This is the end of my research. I did learn more than I intended too and this is definitely the end. If you want to use https you can go on from here or find an alternative to nginx. At least you have got an idea how it could work.
Comments